Office 365 Small Business Premium Activation
![]()

Office 365 Small Business Premium Activation
New Product Key Subscription
These activation steps are to be completed after you have purchased the required number of Product Keys.
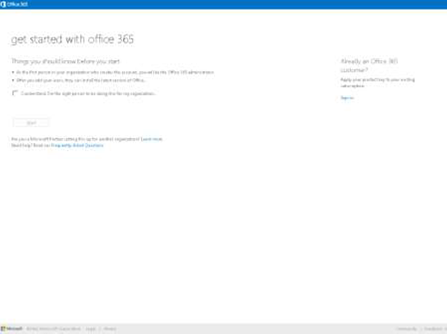
1. Go to www.office.com/setup365 and click the “I understand” checkbox and then the “Start” button to begin.
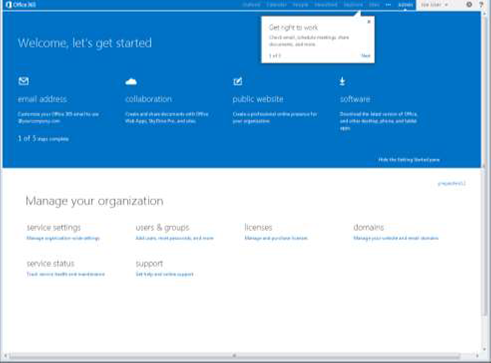
The first user account becomes the default administrator of the service. This can be changed after setup is complete.
Users added during the setup will download Office when they login to the service.
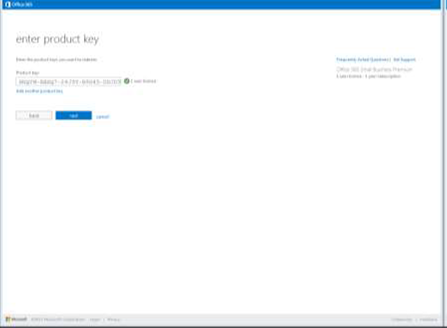
2. Enter the first 25-digit Small Business Premium Product Key. If the Product Key is valid and entered correctly,
then a green check and the number of user licenses associated with that key will appear. The total number of user
licenses to be activated shows on the far right corner of the screen.
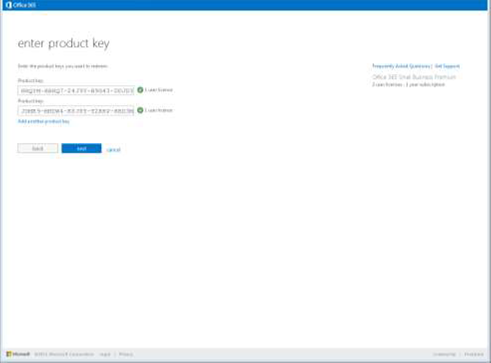
3. If there are additional Product Keys to activate, then click the “Add another Product Key” link, enter the
remaining Product Keys, and click “Next.” For the best user experience, be sure to enter all Product Keys during
the setup process. Customers can also add additional Product Keys via the “Add Seats” wizard at a later date.
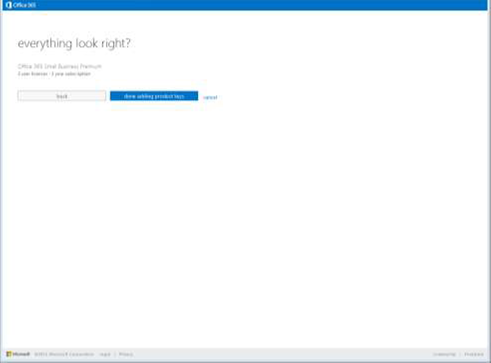
4. Verify that the information in the summary screen looks correct and click the “Done adding Product Keys”
button to continue the process. If the information does not look correct, click the “Back” button and add additional
Product Keys.
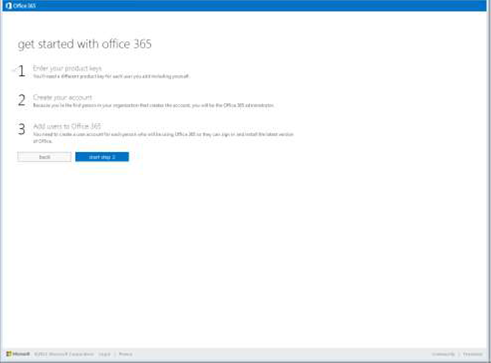
5. Click the “Start step 2” button to continue the setup process. The first step of the three-step setup process has
been completed. The remaining steps are to create an Office 365 account and assign any users if required.
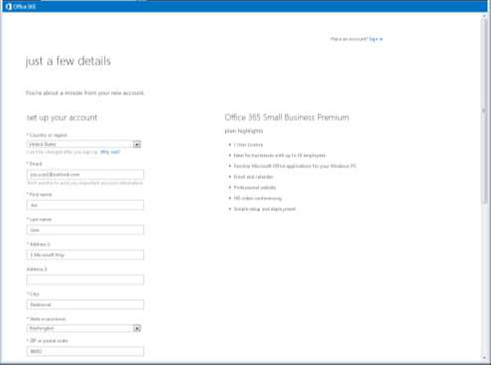
6. Create an Office 365 Account. If the customer does not have an Office 365 account already, then complete the
sign-up form. If the customer is already an existing Office 365 Plan P1 subscriber, click the Sign-in button to bypass
account setup and begin the “Add Product Key seats” wizard.
7. Click “continue” to create the Office 365 service tenant. Note that “Organization Name” is used to create an
Office 365 service tenant and needs to be unique. By clicking continue, you [the customer] accept the Microsoft
Online Subscription Agreement. At this point, the Product Keys are marked as activated and cannot be used again.
Be sure to keep the Office 365 User ID and password in a safe place so that you can login to the Office 365 service.

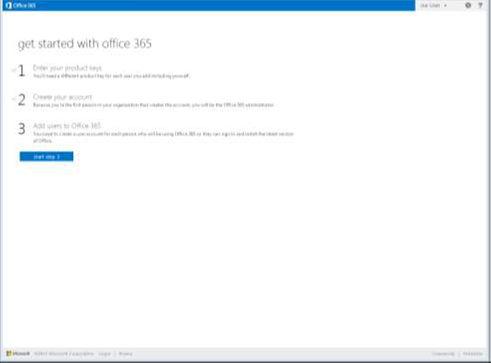
Click the “Start step 3” button to continue the setup process. The second step of the three-step setup process
has been completed. The remaining step is to assign users if multiple Product Keys were entered in Step 1.
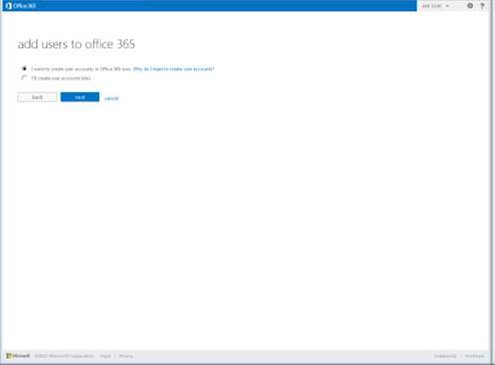
8. If you entered multiple Product Keys during step 1, then click the “I want to create user accounts in Office 365 now” radio button & click the “next” button. This wizard will guide you through creating a user and assigning a license.
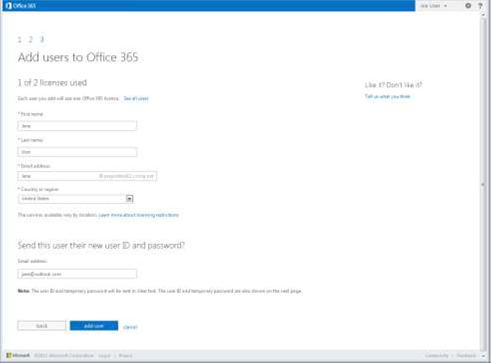
9. Complete the add user form and click the “add user” button. Enter the First and Last name and Email address. Select the country the user resides in, and enter their personal email address if you want to send their new Office 365 user account directly via email to a personal email address; otherwise leave blank.
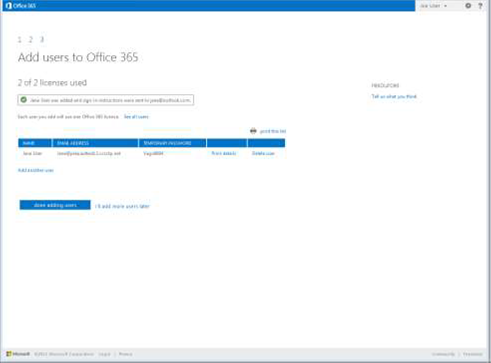
10. If you plan to distribute the Office 365 account and passwords manually, then be sure to print this screen and then the click “done adding users” button. The add user wizard is now complete.
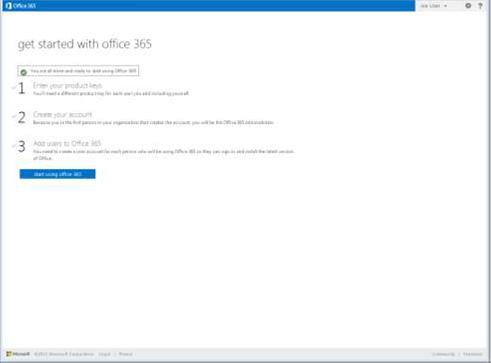
11. The Product Key activation is now complete. Click the “start using office 365” button to begin service setup.
12. Enter the administrator’s mobile phone number and secondary email address, for automatic password reset access, and then click the “save and continue” button. This enables Office 365 to automatically reset your password if it is ever forgotten.

13. Begin the Office 365 Small Business Premium service setup. Follow the Office 365 startup wizard to configure your Office 365 service.