How To Install an SSL Certificate from a Commercial Certificate Authority on raw Linux Server

Introduction

This tutorial will show you how to acquire and install an SSL certificate from a trusted, commercial Certificate Authority (CA). SSL certificates allow web servers to encrypt their traffic, and also offer a mechanism to validate server identities to their visitors. The main benefit of using a purchased SSL certificate from a trusted CA, over self-signed certificates, is that your site’s visitors will not be presented with a scary warning about not being able to verify your site’s identity.

You may use any other CA of your choice.

After you have acquired your SSL certificate, we will show you how to install it on Nginx and Apache HTTP web servers.

 Prerequisites

There are several prerequisites that you should ensure before attempting to obtain an SSL certificate from a commercial CA. This section will cover what you will need in order to be issued an SSL certificate from most CAs.

Registered Domain Name

Before acquiring an SSL certificate, you must own or control the registered domain name that you wish to use the certificate with. If you do not already have a registered domain name, you may register one with one of the many domain name registrars out there (e.g. Namecheap, GoDaddy, etc.).

Domain Validation Rights

For the basic domain validation process, you must have access to one of the email addresses on your domain’s WHOIS record or to an “admin type” email address at the domain itself. Certificate authorities that issue SSL certificates will typically validate domain control by sending a validation email to one of the addresses on the domain’s WHOIS record, or to a generic admin email address at the domain itself. Some CAs provide alternative domain validation methods, such as DNS- or HTTP-based validation, which are outside the scope of this guide.

If you wish to be issued an Organization Validation (OV) or Extended Validation (EV) SSL certificate, you will also be required to provide the CA with paperwork to establish the legal identity of the website’s owner, among other things.

Web Server

In addition to the previously mentioned points, you will need a web server to install the SSL certificate on. This is the server that is reachable at the domain name for which the SSL certificate will be issued for. Typically, this will be an Apache HTTP, Nginx, HAProxy, or Varnish server. If you need help setting up a web server that is accessible via your registered domain name, follow these steps:

  1. Set up a web server of your choice. For example, a LEMP (Nginx) or LAMP (Apache) server–be sure to configure the web server software to use the name of your registered domain
  2. Configure your domain to use the appropriate nameservers. If your web server is hosted on DigitalOcean, this guide can help you get set up: How To Point to DigitalOcean’s Nameservers from Common Domain Registrars
  3. Add DNS records for your web server to your nameservers. If you are using DigitalOcean’s nameservers, follow this guide to learn how to add the appropriate records: How To Set Up a Host Name with DigitalOcean

Choose Your Certificate Authority

If you are not sure of which Certificate Authority you are going to use, there are a few important factors to consider. At an overview level, the most important thing is that the CA you choose provides the features you want at a price that you are comfortable with. This section will focus more on the features that most SSL certificate buyers should be aware of, rather than prices.

Certificate Types

Ensure that you choose a CA that offers the certificate type that you require. Many CAs offer variations of these certificate types under a variety of, often confusing, names and pricing structures. Here is a short description of each type:

  • Single Domain: Used for a single domain, e.g. example.com. Note that additional subdomains, such as www.example.com, are not included
  • Wildcard: Used for a domain and any of its subdomains. For example, a wildcard certificate for *.example.com can also be used for www.example.com and store.example.com
  • Multiple Domain: Known as a SAN or UC certificate, these can be used with multiple domains and subdomains that are added to the Subject Alternative Name field. For example, a single multi-domain certificate could be used with example.com, www.example.com, and example.net

In addition to the aforementioned certificate types, there are different levels of validations that CAs offer. We will cover them here:

  • Domain Validation (DV): DV certificates are issued after the CA validates that the requestor owns or controls the domain in question
  • Organization Validation (OV): OV certificates can be issued only after the issuing CA validates the legal identity of the requestor
  • Extended Validation (EV): EV certificates can be issued only after the issuing CA validates the legal identity, among other things, of the requestor, according to a strict set of guidelines. The purpose of this type of certificate is to provide additional assurance of the legitimacy of your organization’s identity to your site’s visitors. EV certificates can be single or multiple domain, but not wildcard

This guide will show you how to obtain a single domain or wildcard SSL certificate from GoDaddy and RapidSSL, but obtaining the other types of certificates is very similar.

Additional Features

Many CAs offer a large variety of “bonus” features to differentiate themselves from the rest of the SSL certificate-issuing vendors. Some of these features can end up saving you money, so it is important that you weigh your needs against the offerings carefully before making a purchase. Example of features to look out for include free certificate reissues or a single domain-priced certificate that works for www. and the domain basename, e.g. www.example.com with a SAN of example.com


Generate a CSR and Private Key

After you have all of your prerequisites sorted out, and you know the type of certificate you want to get, it’s time to generate a certificate signing request (CSR) and private key.

If you are planning on using Apache HTTP or Nginx as your web server, use openssl to generate your private key and CSR on your web server. In this tutorial, we will just keep all of the relevant files in our home directory but feel free to store them in any secure location on your server:

cd ~

To generate a private key, called example.com.key, and a CSR, called example.com.csr, run this command (replace the example.com with the name of your domain):

openssl req -newkey rsa:2048 -nodes -keyout example.com.key -out example.com.csr

At this point, you will be prompted for several lines of information that will be included in your certificate request. The most important part is the Common Name field which should match the name that you want to use your certificate with–for example, example.com, www.example.com, or (for a wildcard certificate request) *.example.com. If you are planning on getting an OV or EV certificate, ensure that all of the other fields accurately reflect your organization or business details.

For example:

Country Name (2 letter code) [AU]:US
State or Province Name (full name) [Some-State]:New York
Locality Name (eg, city) []:New York
Organization Name (eg, company) [Internet Widgits Pty Ltd]:My Company
Organizational Unit Name (eg, section) []:
Common Name (e.g. server FQDN or YOUR name) []:example.com
Email Address []:sammy@example.com

This will generate a .key and .csr file. The .key file is your private key, and should be kept secure. The .csr file is what you will send to the CA to request your SSL certificate.

You will need to copy and paste your CSR when submitting your certificate request to your CA. To print the contents of your CSR, use this command (replace the filename with your own):

cat example.com.csr

Now we are ready to buy a certificate from a CA.

Please note: If you are asked to enter password do not use alpha numeric characters. Use only alphabets

Install Certificate On Web Server

After acquiring your certificate from the CA of your choice, you must install it on your web server. This involves adding a few SSL-related lines to your web server software configuration.

We will cover basic Nginx and Apache HTTP configurations on Ubuntu 14.04 in this section.

We will assume the following things:

  • The private key, SSL certificate, and, if applicable, the CA’s intermediate certificates are located in a home directory at /home/sammy
  • The private key is called example.com.key
  • The SSL certificate is called example.com.crt
  • The CA intermediate certificate(s) are in a file called intermediate.crt
  • If you have a firewall enabled, be sure that it allows port 443 (HTTPS)

Note: In a real environment, these files should be stored somewhere that only the user that runs the web server master process (usually root) can access. The private key should be kept secure.

Nginx

If you want to use your certificate with Nginx on Ubuntu 14.04, follow this section.

With Nginx, if your CA included an intermediate certificate, you must create a single “chained” certificate file that contains your certificate and the CA’s intermediate certificates.

Change to the directory that contains your private key, certificate, and the CA intermediate certificates (in the intermediate.crt file). We will assume that they are in your home directory for the example:

cd ~

Assuming your certificate file is called example.com.crt, use this command to create a combined file called example.com.chained.crt (replace the highlighted part with your own domain):

cat example.com.crt intermediate.crt > example.com.chained.crt

Now go to your Nginx server block configuration directory. Assuming that is located at /etc/nginx/sites-enabled, use this command to change to it:

cd /etc/nginx/sites-enabled

Assuming want to add SSL to your default server block file, open the file for editing:

sudo vi default

Find and modify the listen directive, and modify it so it looks like this:

    listen 443 ssl;

Then find the server_name directive, and make sure that its value matches the common name of your certificate. Also, add the ssl_certificate and ssl_certificate_key directives to specify the paths of your certificate and private key files (replace the highlighted part with the actual path of your files):

    server_name example.com;
    ssl_certificate /home/sammy/example.com.chained.crt;
    ssl_certificate_key /home/sammy/example.com.key;

To allow only the most secure SSL protocols and ciphers, add the following lines to the file:

    ssl_protocols TLSv1 TLSv1.1 TLSv1.2;
    ssl_prefer_server_ciphers on;
    ssl_ciphers 'EECDH+AESGCM:EDH+AESGCM:AES256+EECDH:AES256+EDH';

If you want HTTP traffic to redirect to HTTPS, you can add this additional server block at the top of the file (replace the highlighted parts with your own information):

server {
    listen 80;
    server_name example.com;
    rewrite ^/(.*) https://example.com/$1 permanent;
}

Then save and quit.

Now restart Nginx to load the new configuration and enable TLS/SSL over HTTPS!

sudo service nginx restart

Test it out by accessing your site via HTTPS, e.g. https://example.com.

Apache

If want to use your certificate with Apache on Ubuntu 14.04, follow this section.

Make a backup of your configuration file by copying it. Assuming your server is running on the default virtual host configuration file, /etc/apache2/sites-available/000-default.conf, use these commands to to make a copy:

cd /etc/apache2/sites-available
cp 000-default.conf 000-default.conf.orig

Then open the file for editing:

sudo vi 000-default.conf

Find the <VirtualHost *:80> entry and modify it so your web server will listen on port 443:

<VirtualHost *:443>

Then add the ServerName directive, if it doesn’t already exist (substitute your domain name here):

ServerName example.com

Then add the following lines to specify your certificate and key paths (substitute your actual paths here):

SSLEngine on
SSLCertificateFile /home/sammy/example.com.crt
SSLCertificateKeyFile /home/sammy/example.com.key

If you are using Apache 2.4.8 or greater, specify the CA intermediate bundle by adding this line (substitute the path):

SSLCACertificateFile /home/sammy/intermediate.crt

If you are using an older version of Apache, specify the CA intermediate bundle with this line (substitute the path):

SSLCertificateChainFile /home/sammy/intermediate.crt

At this point, your server is configured to listen on HTTPS only (port 443), so requests to HTTP (port 80) will not be served. To redirect HTTP requests to HTTPS, add the following to the top of the file (substitute the name in both places):

<VirtualHost *:80>
   ServerName example.com
   Redirect permanent / https://example.com/
</VirtualHost>

Save and exit.

Enable the Apache SSL module by running this command:

sudo a2enmod ssl

Now restart Apache to load the new configuration and enable TLS/SSL over HTTPS!

sudo service apache2 restart

How to make more secure :

<VirtualHost *:80> ServerName example.com Redirect permanent / https://www.example.com/

</VirtualHost>

<VirtualHost *:443> ServerName example.com SSLEngine on SSLCertificateFile /home/example/www_example_com.crt

SSLCertificateKeyFile /home/example/example_com.key

SSLCACertificateFile /home/example/intermediate.crt

SSLProtocol -all +TLSv1.2 
SSLCipherSuite "EECDH+ECDSA+AESGCM EECDH+aRSA+AESGCM EECDH+ECDSA+SHA384 EECDH+ECDSA+SHA256 EECDH+aRSA+SHA384 EECDH+aRSA+SHA256 EECDH EDH+aRSA !aNULL !eNULL !LOW !3DES !MD5 !EXP !PSK !SRP !DSS !RC4"
SSLHonorCipherOrder on 
SSLCompression off 
SSLSessionTickets off 
ServerAdmin webmaster@localhost 
DocumentRoot /var/www/html <Directory 
/var/www/html/> Options Indexes FollowSymLinks AllowOverride All 
Require all granted </Directory> 
ErrorLog ${APACHE_LOG_DIR}/error.log 
CustomLog ${APACHE_LOG_DIR}/access.log combined 
</VirtualHost>


Streamlining group chat creation in Google Hangouts on the web

Last year, we launched the ability to create and share short links to Hangouts group chats. This allows your team to opt-in to a chat, rather than having to invite people one by one. Today, we’re streamlining how you create group chats to make it easier to create group chats for projects or teams. In the improved flow, you can now name your group chats more easily when you are creating a group chat. Once the group chat has a name, this allows you to create “placeholder” group chats which you can then share with a link.

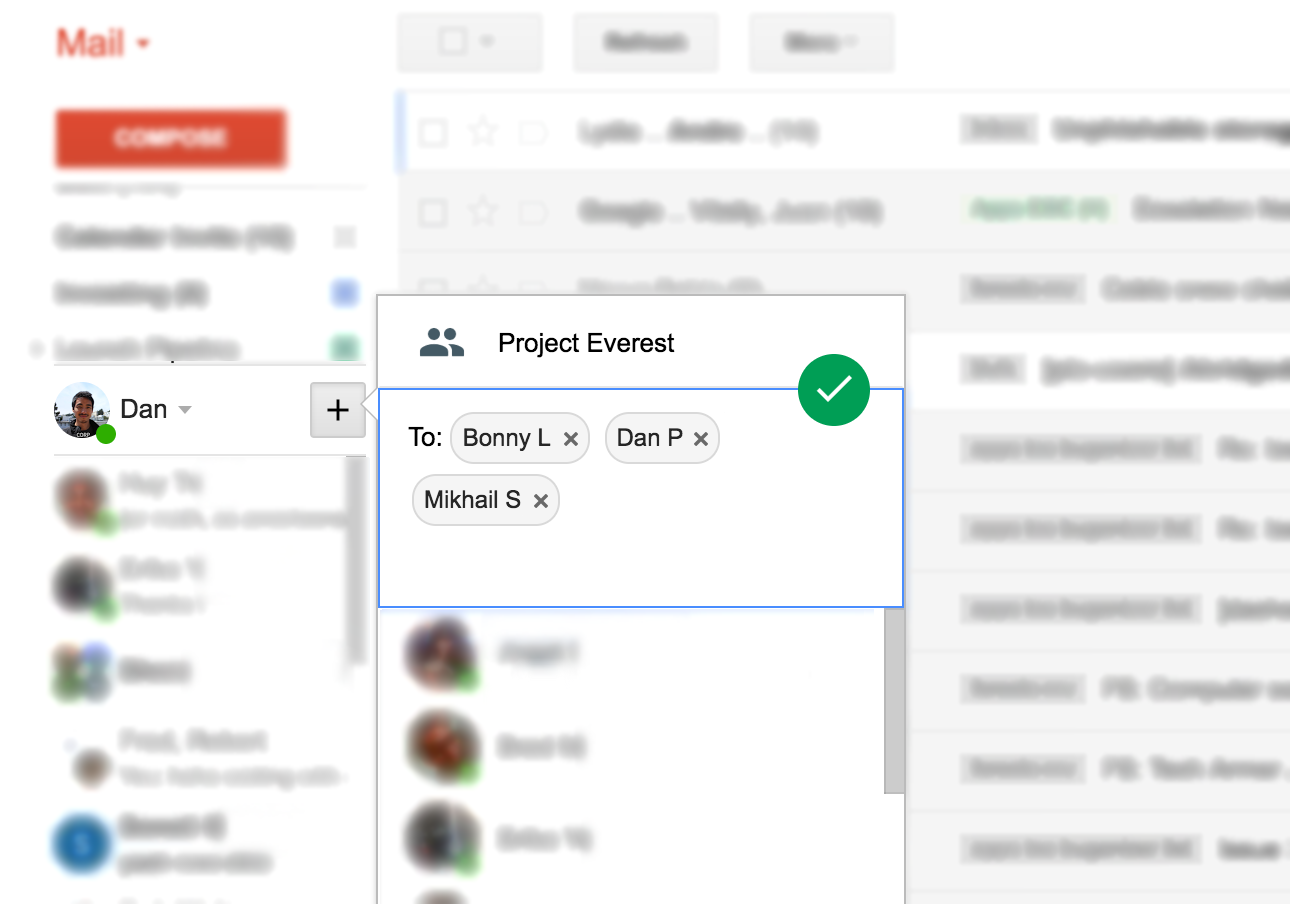
Streamlined group chat creating in Hangouts with people 2

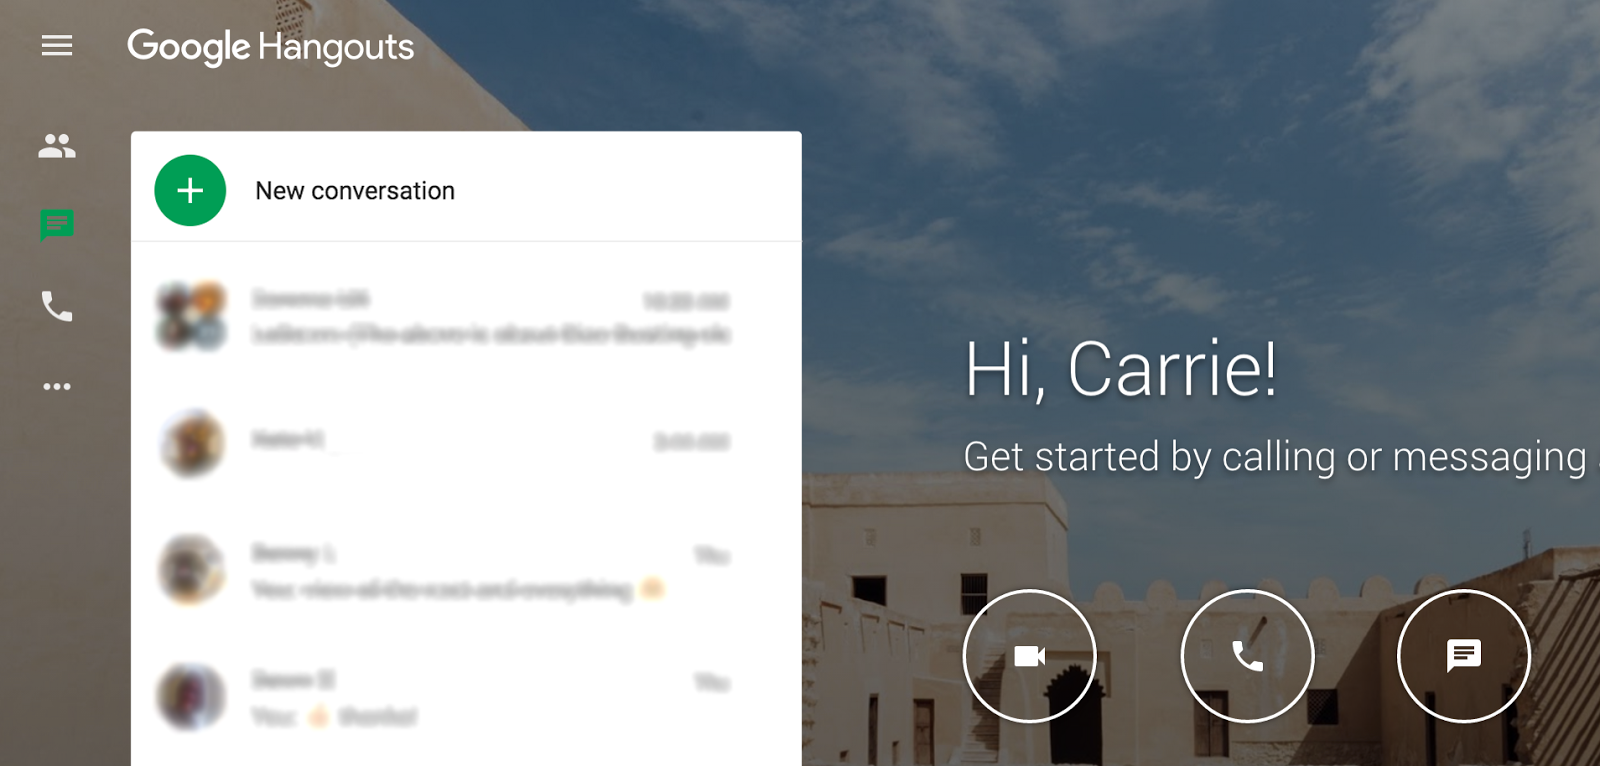
These improvements will be in available all three Hangouts user interfaces on the web. In Hangouts in Gmail, a “+” button will be available next to your contacts list in Hangouts. In hangouts.google.com and in the Chrome extension, you’ll see a “New conversation” option. By clicking “New group” or “New conversation” you can name the group, start adding members, or both.


Google Hangouts New Conversation button 3

Launch Details
Release track:
Launching to both Rapid release and Scheduled release

Editions:
Available to all G Suite editions

Rollout pace: Full rollout (1-3 days for feature visibility)

Impact:
All end users


Reference by Google.com

Manage iOS devices without MDM profiles

G Suite administrators who want their employees to use their own mobile devices at work face a challenge: all Enterprise Mobility Management (EMM) solutions available today require an agent or profile to mandate corporate mobile policies, but employees are uncomfortable setting up these agents and profiles on their personal devices. Oftentimes, they choose not to add their corporate accounts to their personal devices at all.

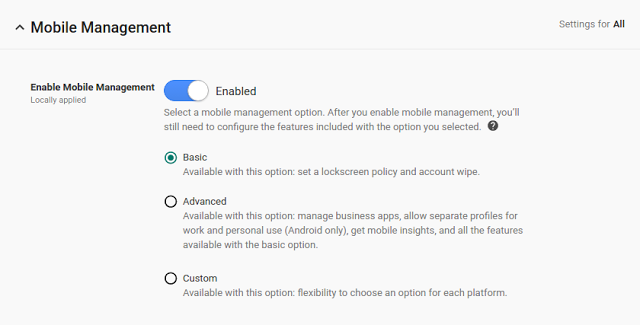
To meet the needs of both admins and employees, today we’re introducing an agentless way to manage iOS devices: Basic Mobile Management.
Basic MM 2
Basic MM 1
Basic Mobile Management allows admins to mandate basic security on iOS devices without requiring users to install an MDM profile. It also relieves admins of the need to set up an Apple Push Certificate and the hassles of renewing that certificate regularly.

With Basic Mobile Management, admins can:
Enforce a screen lock.
Wipe a corporate account (but not the entire device).
View, search, and manage their device inventory.

Basic Mobile Management makes it easier for employees to use their personal devices at work as well, by allowing them to set up their corporate accounts just like they would their personal accounts.

Organizations that require additional restrictions, mobile audit, or application management on iOS devices should continue using the Advanced Mobile Management option.

For more details on Basic Mobile Management and how to get started, check out the Help Center.

Please note that agentless management is only available for iOS devices at this time. Users will still need to install the Device Policy app on their Android devices, even if their admin has chosen Basic Mobile Management.

Launch Details
Release track:
Launching to both Rapid release and Scheduled release

Editions:
Available to all G Suite editions

Rollout pace:
Gradual rollout (potentially longer than 3 days for feature visibility)

Impact:
Admins only

Action:
Admin action suggested/FYI


Reference by Google.com

New iterative calculation settings and more in Google Sheets

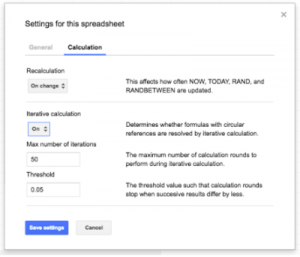
To prevent the errors that sometimes plague complex calculations, today we’re launching a new setting in Google Sheets on the web (File > Spreadsheet settings > Calculation > Iterative calculation) that allows you to set the maximum number of times a calculation with a circular reference can take place. In addition, you can specify a “convergence threshold,” and when results from successive calculations differ by less than that threshold value, the calculations will stop (even if the maximum number of calculations has yet to be reached).
iterative-calc-settings- Google Sheets
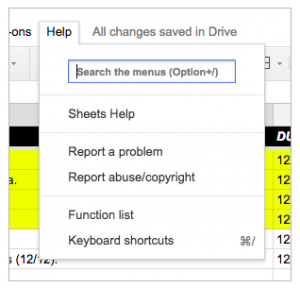
Over the course of the week, we’ll make additional improvements to your Sheets experience on the web and Android devices. First, we’ll update the Sheets Android app UI to make it easier for users with right-to-left language settings to read and navigate. Second, we’ll make it possible to search the menus in Sheets on the web, much like you can in Google Docs and Slides.
menu-search-1- google sheets

menu-search-2

Search the menus while in Compact Controls mode

For more details on these features, please visit the Help Center.

Launch Details
Release track:

  • Launching to Rapid release, with Scheduled release coming on January 9th, 2017
    • Iterative calculation setting
  • Launching to both Rapid release and Scheduled release
    • Right-to-left language improvements
    • Menu search

Editions:
Available to all G Suite editions

Rollout pace:
Gradual rollout (potentially longer than 3 days for feature visibility)

Impact:
All end users

Action:
Change management suggested/FYI


Reference by google.com


Ransoc – An unusual ransomware that threatens to expose your personal information

Mostly a ransomware encrypts your files and demands money in exchange for a key that can decrypt the data. And the payment is demanded in Bitcoins. Ransoc is different in the way it works and the medium it uses for the payment.

How does Ransoc work?
Once your computer is infected by Ransoc, it gathers your personal information from your Skype and social media profiles and scans your system for Torrent files and other sensitive information. It then displays a ransom note. Interestingly, the ransom note is customized for a particular user and has their social media details including their profile picture. The ransom note threatens the victim with a fake legal proceeding and also that the ‘sensitive’ information found on their computer will be made public if the ransom is not paid.

Now, two important points to note here:

  1. Ransoc, unlike other ransomware, does not encrypt any files on the infected computer.
  2. Reportedly, the ransom note is displayed only in a case where the ‘sensitive’ information found by the ransomware includes child pornography or illegally downloaded Torrent media files.

So basically, the creators of this ransomware are targeting the victim’s fear of facing legal complications and losing their reputation instead of their data.

Further, where all ransomware creators use Bitcoin to remain hidden from law enforcement, Ransoc asks its victims to pay via credit card; this kind of payment approach has been unheard of in ransomware attacks till now.

How Quick Heal helps?

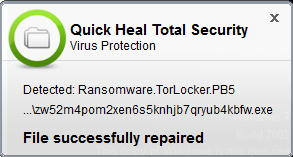
Quick Heal’s Virus Protection proactively detects the ransomware as “Ransomware.TorLocker.PB5” and prevents it from performing any activity on your computer.

Quick heal Total Security Detected Ransomeware

How to stay safe from ransomware attacks

  • Never click on links or download attachments that arrive in emails from unwanted, unknown or unexpected sources.
  • Apply all recommended security updates (patches) to your Operating System, and programs like Adobe, Java, web browsers, etc.
  • Take regular backups of your files. Remember to disconnect the Internet when you are backing up on a hard drive. Unplug the drive before you go online again.
  • Avoid using outdated browser plugins or plugins that you do not use anymore.
  • Invest in an antivirus software that comes with several layers of security such as Web Security that blocks infected websites, Email Security that blocks infected emails, Phishing Protection that blocks fake websites, etc.
  • Always keep your antivirus software up-to-date to stay safe against new threats.

Reference by Quickheal


How to setup Google Sync on your iPhone or iPad

How to set up Google Sync on your iPhone or iPad

The Google Sync setup is nearly identical to Exchange: You just need to have a paid Google account and enter the following settings.

  1. Launch the Settings app from your Home screen.
  2. Tap Calendar.
  3. Tap Accounts.
  4. Tap Add Account.
    calendar-ios-10-set-up-google-account-screens
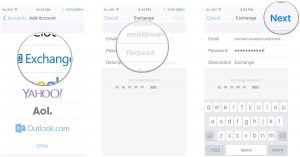
  5. Tap Exchange.
  6. Enter your Gmail or Google Account email and password (the description field will automatically update as your email address).
  7. Tap on Next.
    calendar-ios-10-set-up-exchange-google-screens-01
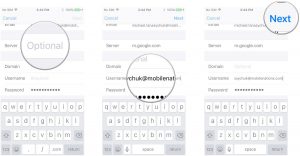
  8. Enter m.google.com as the Server.
  9. Leave the Domain field blank.
  10. Enter your full Gmail or Google Account email address as the Username. (Yup, just like above.)
  11. Tap on Next.
    calendar-ios-10-set-up-exchange-google-screens-02
  12. Tap the switches next to each service’s account that you’d like to sync with your phone. If you have existing calendars, contacts, or mail on your iPhone, you’ll be asked to either keep them on your phone or delete them. Tap the option you want.
  13. Tap on Save.

google sync calendar-ios-10-set-up-exchange-google-screens-03


Google Drive sharing notification improvements to support Gmail smart hosting

Some small but important changes are coming to the way that Google Drive sends notification emails. Your users will not see any visible changes, but if you use Gmail’s advanced smart hosting features, then you may notice a difference in the way new emails are archived or filtered by your mail solutions.

What’s changing:

  • Google Drive will no longer store a ‘courtesy copy’ in the mailbox of the sender. Gmail’s comprehensive mail storage feature will now place a copy of Drive sharing notification emails in the sender’s Sent folder.
  • If you use smart hosting (through an outbound mail server), you can now capture and deliver these emails through your preferred mail gateway.
  • If you previously relied on outbound gateway settings to route Drive notifications, you can now use content compliance rulesor sending routing rules to route these messages, making it consistent with other mail routing features.

What’s not changing:

  • The “from” field is not changing. It will continue to be the sender when the recipient is a group, or drive-shares-noreply@google.comin all other cases, as it is today.
  • The message header fields are not changing. The envelope sender will still be [string]@doclist.bounces.google.com, not the actual account of the sender.
  • Request access notifications will not behave differently.

These changes will roll out to G Suite customers over a few days, starting on November 28, 2016.

Launch Details
Release track:
Launching to both Rapid and Scheduled release

Editions:
Available to all G Suite editions

Reference by Google.com

45 Killer Security Tips to Follow on Computer Security Day

30th November is observed as Computer Security Day all over the world.On this important day, we have lined out an exhaustive list of some of the best security tips on how to keep your digital lives safe, secure, and hackproof. So, let’s get cracking!

  • While revealing any personal or financial information on the Internet, ensure that the website’s URL begins with ‘https’ and is accompanied by a padlock symbol. These two elements indicate that you are on a secure website and that your information is safe.
  • While using free, unsecured WiFi networks or public cyber cafes, never shop or bank online, or login into online accounts.
  • Always go for long, unique, and hard-to-guess passwords. Keep different passwords for different online accounts.
  • Use Secure Browsing for your Facebook account.
  • Don’t bother selecting options that say ‘Keep me logged in’ or ‘Remember me’ on websites, especially when you are on public computers.
  • Prefer keeping a secondary email address for using it on websites that require you to share certain personal information. Also,  use your primary email address to stay in touch with people you know or are acquainted with.
  • Avoid using your official email address for social media sites or any other websites other than that of your organization.
  • For sites related to social media, music downloads, file sharing, etc., use an email address that you do not use for important communications such as those related to your bank, income tax, medical appointments, and the like.
  • Tighten your privacy settings on Facebook so that only your friends are notified about your activity.
  • While choosing a password, ensure that you are not using any kind of personal information such as your name, date of birth, address, pet’s name, street name and so on.
  • While using the Internet in a public place like restaurants, shopping malls, airports, etc., ensure that no one’s snooping on you from behind your back.
  • If you receive any emails that ask you for your personal or banking information, delete them straightaway. Exercise caution against links or attachments in unexpected or unsolicited emails. It is wise to verify any such communication with the sender first, before responding to them.
  • If there is any online account of yours which you are not using for a long time, have it removed or deactivated.
  • It is wise not to make your photos or videos public on the Internet. Keep them visible only to people you know personally.
  • Never respond to pop-up advertisements that may come up on your screen, no matter how inviting or genuine they may look. The safest way to close such pop-ups is from the task manager; press Alt+Ctrl+Delete.
  • Before downloading and installing any kind of free software, do a quick research on the software and the website hosting it. Reading user reviews about the same is also important.
  • Do not visit websites that you are not fully aware of or those that can be accessed from emails or mobile messages.
  • If you have downloaded a file online, ensure that you check its extension before clicking on it. Files with multiple extensions can be bad news for your computer.
  • Make it a point to log out once you are done. This is more essential when you are using a system in a cyber café.
  • Avoid responding to or clicking on social media posts that claim to show unusual content such as shocking videos or unseen events, etc. Always verify such news from genuine news websites.
  • It is advisable to access your bank’s website by typing its URL in the address bar. Never access the same from an email or SMS.
  • Secure your wireless network at home by changing its default password and using WPA2 encryption.
  • Always keep your computer’s operating system and other programs up-to-date and patched. It is advisable to keep Automatic Updates to ON.
  • If you can’t avoid using an unsecured WiFi connection for checking your emails or doing an online transaction, consider using a VPN (Virtual Private Network). This will ensure that your private details do not get snooped on by anyone.
  • Never download software/applications that come as attachments in emails, even if the emails look like that have been sent from a trusted source.
  • For online shopping, trust well-known and reputed websites that have been in the market for quite some time.
  • If you are installing any browser plugin, ensure that it is trusted and is a current one.
  • Protect your computer with a security software that offers multilayered protection from viruses, spyware, Trojans, malware, and online banking threats.
  • Increase your knowledge about cyber threats and cyber security; share the same with friends, family and acquaintances.
  • Always trust your instinct. If you think an online offer, or an email sounds too good to be true or suspicious, assume that it is.
  • If you are buying from an online website for the first time, it is advisable to choose the Cash On Delivery option, instead of making an upfront payment.
  • Ensure that you change your online banking passwords every 6 months, and never share them with anyone.
  • Avoid the option of saving your credit/debit card information on websites.
  • Any kind of financial details should not be shared on phone or email, even if the caller/sender seems genuine or appear to belong from a reputed organization.
  • Avoid downloading software from unverified publishers. Your system will always prompt you the information whether the publisher is verified or not before the software gets installed.
  • Always lock your computer and smartphone when not in use. Do not leave it unattended, especially in public places.
  • Create passwords that have a mix of uppercase and lowercase letters, numbers, and special characters. Also ensure that your password is at least 8 characters long.
  • Accept friend requests, on social media and other online platforms, only from people you know and are acquainted with.
  • Protect your smartphone and other mobile devices with a screen lock such as PIN or PASSWORD. Turn the automatic screen lock function ON.
  • Avoid rooting or jailbreaking your device; this makes your device more vulnerable to malware and attackers.
  • Install apps only from trusted and official sources like App Store, Google Play Store, etc.
  • Turn OFF Wi-Fi, Location Services, and Bluetooth when not in use.
  • Avoid sending or saving overly sensitive information like passwords, user IDs, banking information, etc., on your mobile device.
  • Avoid installing mobile apps that ask for unnecessary or more-than-required permissions.
  • Protect your mobile device with a reliable mobile security app that can automatically prevent installation of malicious apps, block infected or malicious websites and offers features such as anti-malware, anti-theft, location tracking, secure data backup, call & SMS blocking, etc.


Reference by Quick Heal

Five new ways to reach your goals faster with G Suite

One of the core promises of Google Docs is to help you and your team go from collecting ideas to achieving your goals as quickly and easily as possible. That’s why last month we launched Explore in Docs, Sheets and Slides — with machine intelligence built right in — to help your team create amazing presentations, spreadsheets and documents in a fraction of the time it used to take.

Today, we’re introducing five new time-saving features designed to speed up and simplify the way you work, so you can focus on bringing your team’s ideas to life.

1. Spend less time figuring out who owns what with Action Items

According to research by the McKinsey Global Institute, employees spend about 20 percent of their work week — nearly an entire day — searching for details internally and tracking down colleagues for answers. This can be especially true when a document is full of ideas, requests and comments, making it difficult to get a clear sense of who’s responsible for what.

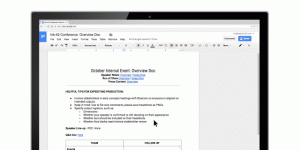
To help keep your projects moving, when you type phrases like “Ryan to follow up on the keynote script,” or “Andrea to schedule a weekly check in” on desktop, Docs will intelligently suggest an Action Item to assign to the right person, thanks to Natural Language Processing (NLP).

g-suite-bundle

You can also manually assign an Action Item to someone in the Docs, Sheets and Slides desktop and mobile apps by mentioning their name in a comment and checking the new Action Item box. The assignee will get an email notification and see the Action Item(s) clearly highlighted with a blue bar when they open the file.

G-Suite-Bundle-Image

2. Spend less time searching for the files that need attention

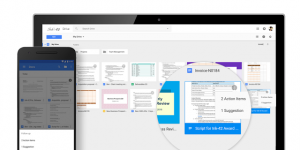
Once Action Items have been assigned, it’s easy for team members to identify documents, spreadsheets and presentations that need their attention. The next time they visit Docs, Sheets, Slides (or Drive) from their laptops or mobile apps, they’ll see a badge on any files with Action Items assigned to them, plus any unresolved suggestions that others have made to their files.

blogpost_priority_docs


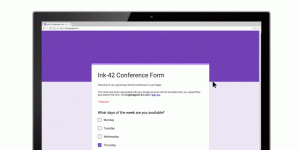
3. Spend less time building questions with smarter Forms

Since its launch in 2008, more than a billion questions have been asked in Forms, allowing us to identify common patterns, like question types and the response options that usually go with them. With the help of neural networks, we can now predict the type of question you’re asking and suggest potential responses for you to choose from, giving you back about 25 percent of the time you used to spend creating a Form.

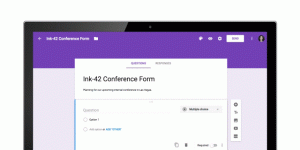
Let’s say you’re planning an all-day event at the office and need to know which day works best for your team. When you type “What days are you available next week?” Forms will intelligently determine that “Checkbox” is the ideal question type, and generate related response options that you can add one by one or all together.


formautosuggest-5


Also debuting today is a top-requested feature from our business and education customers — the new “File upload” question type. Your respondents can now upload files from their computer or Drive — all of which are neatly collected for you in a new Drive folder. Note: This feature is only available for G Suite customers in Forms shared within their organization.


formsfileupload-5


4. Spend less time typing with a set of new voice commands

Last year, we launched Voice typing in Docs on the web to help you capture ideas, big and small, without lifting a finger. Today, we’re adding more ways to format and customize content with commands for changing text color, deleting words, inserting links and comments, plus a number of other ways to format, hands-free.

5. Spend less time switching between apps to get things done

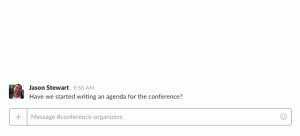
We want you to be as productive and collaborative as possible, regardless of the tools you choose to work with, so we’ve partnered with Slack to make it even easier to work with Google Docs files. With a click of the “+” button in Slack, you can bring files from Drive directly into a conversation with your team, or create new Docs, Sheets and Slides files right from Slack. You can check out more details on Slack’s blog.

slack

With the introduction of Explore, and more and more updates to products that build in machine intelligence, taking back time spent on mundane, repetitive tasks will only get easier with G Suite. Now, you can focus your energy on creative and strategic work, not busy work.

Launch Details
Release track:

  • Launching to both Rapid release and Scheduled release
    • Assigned action items
    • Priority badges
    • Voice typing improvements
    • Slack integration
  • Launching to Rapid release, with Scheduled release coming on November 2nd, 2016
    • Suggested action items
    • Suggested response options in Forms
  • Launching to Rapid release, with Scheduled release coming on November 9th, 2016
    • File uploads in Forms

Editions:
Available to all G Suite editions

Rollout pace:
Gradual rollout (potentially longer than 3 days for feature visibility)

Impact:
All end users

Reference by Google


How To Set Up Office 365 On An IPhone

Following are the steps on how to set up office 365 on an iphone


1. Click on Settings

office365-iphone6-1


2. Click on Mail, Contacts, Calendars

office365-iphone6-2

3. Click on Add Account

office365-iphone6-3

4. Click on Exchange

office365-iphone6-4

5. Enter your email address and password then click on next

office365-iphone6-5

6. (Optional) – If this screens pops up enter outlook.office365.com in the server field

office365-iphone6-6

7. Choose what you would like synced with Office 365 and your iPhone and then click on save

office365-iphone6-7