How to configure an e-mail account in Outlook Express

If you have an email account set up on the server, you may want to configure Outlook or Outlook express to send/receive email from this email address. To configure Outlook to connect to your account, please do the following:

  1. Open Outlook Express
  2. Go to “Tools” and click on “Accounts
    OutlookExpress
  3. An “Internet Accounts” window will pop up. Select the Mail tab, then “Add“, then click on “Mail“.
    OutlookExpress
  4. This will start up Internet Connection Wizard. Enter your name where it says “Display name:” and click “Next” at the bottom right.
    OutlookExpress
  5. Select the Next button
  6. Enter your Email address in the input box. This does NOT have to be your “username@yourdomain.com”( you can use “john@yourdomain.com, webmaster@yourdomain.com, etc). Then click Next

  7. Click the Next button
  8. In the Incoming mail field type mail.yourdomain.com.In the Outgoing mail (SMTP)field type mail.yourdomain.com
    (so if your domain name is elitepolls.com, then you would put “mail.elitepolls.com” there). Click Next
    OutlookExpress
  9. For the Account Name, type the full email address (including the domain name). In the Password section, type the password for the email.
    OutlookExpress
  10. Click the Next button
  11. Click the Finish button
    OutlookExpress
  12. You should still see the Mail tab, so click the Properties button
  13. Select the Servers tab
  14. Check the box at the bottom which says “My server requires authentication”
  15. Select the Advanced tab
  16. At the top, you will see “Server Port Numbers” and “Outgoing mail (SMTP):” with a value of 25. You need to change this to port 26 if you are not able to send emails using 25.
  17. Click the Apply button, OK button, and the Close button.
  18. You’re done! Now you can test your email.

Users with legacy Android devices can now access work apps in Google Play

Recently, we announced that your organization’s private apps would move from the “Private Channel” (i.e. the “domain.com” tab) to the “Work Apps” tab in the Google Play Store. We envision this Work Apps section as a single destination where users can find all of the applications they need to be productive on mobile. Using Google Mobile Management, G Suite administrators can offer a curated set of both public and custom apps to their employees in the Work Apps section of Google Play.

Previously, however, employees with Android devices that did not support work profiles could not see the Work Apps tab and the apps their admins had curated. This included any users with Android devices running 5.0 Lollipop or less. With this launch, employees with these older devices can now access the Work Apps tab in Google Play (in their personal profile) and the apps their admins have curated.

Google Play for Work on Legacy Devices

Note that on devices that do support work profiles, the Work Apps tab can only be accessed from Google Play in the work profile.

Launch Details
Release track:
Launching to both Rapid release and Scheduled release

Editions:
Available to all G Suite editions

Rollout pace:
Full rollout (1–3 days for feature visibility)

Impact:
All end users

Action:
Change management suggested/FYI


Reference by Google.com

Support for rotated text, accounting number formats, and more in Google Sheets

We’re working hard to ensure that Google Sheets meets your business needs. As part of that effort, today we’re introducing several enterprise-friendly features that you’ve been asking for in Sheets on the web, Android, and iOS:

Rotated text
You can now rotate the text in a cell in Sheets (Format > Text rotation). This is especially useful when you need to fit long header names into thin columns, or when you simply want to fit more text on a single screen.


Rotated text 1

Accounting number formats
We’re making it easier to read your budgets, expense reports, and other spreadsheets containing monetary amounts by aligning the currency symbols within them (Format > Number > Accounting). We’re also making improvements to the way numbers, decimal points, and repeated characters line up to make them simpler to scan and analyze.

Accounting number formats 2

More border styles
You can now choose from several new border styles in Sheets, including various thicknesses and double borders, which are commonly used in financial statements like balance sheets (Toolbar > Borders > Border styles).

Additional improvements on mobile
In addition to the features described above, we’re also launching the following improvements to our mobile apps:

  • Support for using a mouse with the Sheets Android app
  • Ability to view and select existing custom colors in the Sheets Android app
  • Ability to drag and drop rows and columns in the Sheets Android and iOS apps
  • Formatting suggestions in Explore in the Sheets iOS app

For more details, check out the Help Center articles below.

Launch Details
Release track:
Launching to both Rapid release and Scheduled release

  • All mobile features
  • Additional border styles on the web

Launching to Rapid release, with Scheduled release coming on March 6, 2017

  • Rotated text on the web
  • Accounting number formats on the web

Editions:
Available to all G Suite editions

Rollout pace:
Gradual rollout (potentially longer than 3 days for feature visibility)

Impact:
All end users

Action:
Change management suggested/FYI

Reference by Google.com

Resolve conflicting accounts with the new Transfer tool for unmanaged users

If your organization recently made the jump to G Suite, you may have employees who previously set up personal Google Accounts using your company’s domain name. With this launch, we’re making it easier to identify and transfer those accounts before they become conflicting accounts.

Using the new Transfer tool for unmanaged users, you can view all personal Google Accounts with email addresses that match the G Suite email addresses for your organization. You can then send emails to those individuals, requesting that they convert their personal accounts to G Suite accounts. Later, you can view the statuses of those requests and cancel them as necessary.

Transfer tool 2

If an employee accepts your request to transfer their account, you’ll be granted access to their data and given the ability to manage that account. If they decline or ignore your request, they’ll be asked to rename their personal account with a different email address when you create a new G Suite account for them. They’ll retain sole access to and control over all of the data in their personal account.

Transfer tool email

Note that these actions must be performed manually. While you can send requests, cancel requests, and download request statuses for multiple users at once, you can’t yet do so in bulk via an API.

We hope this launch will make the transition to G Suite easier for you and your end users alike. For more information about the Transfer tool, please visit the Help Center.

Launch Details
Release track:
Launching to both Rapid release and Scheduled release

Editions:
Available to all G Suite editions

Rollout pace:
Gradual rollout (potentially longer than 3 days for feature visibility)

Impact:
Admins only

Action:
Admin action suggested/FYI


How can I set up G Suite with my iPhone or Android?

Insert videos from Google Drive in Google Slides

Starting today, you can insert and play your Google Drive videos in Google Slides, in addition to videos from YouTube.

Insert Drive video in Slides

Once you’ve added a Drive video to your presentation, you can choose when to start and end it, whether it should autoplay when presenting, and whether it should be muted or play with audio. Simply right-click on the video and select Video options.

video option

If a person viewing your presentation doesn’t have permission to view a video embedded within it, they’ll be prompted to request access.

Note that while you can play Drive videos in Slides on the web and mobile, you can only insert them from the web application. For more details, visit the Help Center.

Launch Details
Release track:
Launching to Rapid release, with Scheduled release coming in two weeks

Editions:
Available to all G Suite editions

Reference by Google.com

Beware of Spora – a professionally designed ransomware

Spora is a recent addition to the ransomware family that Quick Heal Lab has come across.  It is a file encryptor ransomware that encrypts a user’s files with strong encryption algorithm and demands a ransom. Spora is launched with a good infection routine, the capability to work offline, well-designed and managed payment portal dashboard, decryption key purchase options.

Infection Vector

Spora is delivered to the victim via spam emails containing a malicious .ZIP file as an attachment. This .ZIP file contains an HTML Application (‘.HTA’) file that pretends to be an invoice in .PDF or .DOC format, wearing double extensions to those files (e.g. <file_name>.pdf.HTA). As ‘Hide extensions for known file types’ option is marked checked by default in many systems, it increases the chances of getting trapped in opening an .HTA file by mistaking it for harmless file types.

Infection Routine

Spora has a multistage infection behavior. When a malicious .HTA file is executed, it drops and executes the below files into the system using VBScript program:

  • ‘%Temp%\close.js’
  • ‘%Temp%\doc_6d518e.docx’

• It is actually a file encryptor component that performs file encryption.
• doc_6d518e.docx is a corrupt file that is intentionally dropped and opened to keep the victim busy in viewing it while files are getting encrypted in the background.

spora ransomeware

Figure 1: Corrupt document to fool a victim

Spora was not found appending any extension to the encrypted files. When encryption is over, a ransom note is displayed (shown below), highlighting the uniquely generated ‘Infection ID’ and basic instructions.

spora ransomeware note

Figure 2. Spora ransom note with an infection ID

A .KEY file is dropped on the desktop, containing information about ‘encrypted-encryption keys’ used to encrypt files. In order for the victim to get complete access to the payment portal, they need to upload .KEY file to the portal to synchronize the infected computer with the payment portal. To do so, the below panel is provided.

spora ransomware key

Figure 3. Key upload panel on Spora payment portal


Once synchronized, the victim can choose from a number of purchase options available on a ‘My Purchase’ section of the portal.


spora ransomeware purchase

Figure 4. Decryptor purchase options

FULL RESTORE – With this, the user can have all their encrypted data restored.

IMMUNITY – With this, the user can buy immunity against future Spora attacks.

REMOVAL – With this, the user can have the Spora malware completely removed from their computer.

FILE RESTORE – Offers two options; decrypt two files for free or decrypt a selection of files for $30.

As you can see, Spora offers the victim with a variety of options to take care of the situation. For instance, a victim might be less likely to pay the ransom because they know they have safely backed up their data. However, they would still want to have the malware removed from the system – which gives the ‘Removal’ option.

Quick Heal Detection
Quick Heal antivirus successfully prevents Spora infections at multiple stages.

Quick Heal Email Protection successfully prevents download of the malicious .ZIP attachment which is the first stage of the infection.

Quick Heal detection

Figure 5. Quick Heal Email Protection

As shown in the image above, the malicious .HTA file has been successfully detected as ‘JS.Nemucod.BJF’ and deleted thereafter.

Quick Heal Anti-ransomware protection successfully detects potential file encryption activities and alerts the user

Quick Heal Anti-Ransomware alert

Figure 6. Quick Heal Anti-Ransomware alert

Quick Heal Behavior Detection System successfully detects malicious activities and alerts the user

Quick Heal Behavior Detection System alert

Figure 7. Quick Heal Behavior Detection System alert

Conclusion
It is not hard to guess that the creators of Spora have taken their time in developing this ransomware to make it effective, and professional at the same time.

A nicely designed decryptor portal dashboard, synchronization between the portal and infected system using a .KEY file, and multiple purchase option for decryption signify how attackers are using complex tactics in creating ransomware.

How to stay safe against such ransomware attacks

  • Never download attachments that arrive in emails from unknown or unexpected sources.
  • Take regular backups of your files. Remember to disconnect the Internet when you are backing up on a hard drive. Unplug the drive before you go online again.
  • Apply all recommended security updates (patches) to your Operating System, and programs like Adobe, Java, web browsers, etc.
  • Install an antivirus software that offers several layers of security. More importantly, keep the software up-to-date.


Reference by Quick Heal

Data Privacy Day – 10 tips to keep your data secure

Recognized annually on January 28th, Data Privacy Day is defined as a centered approach towards respecting privacy, safeguarding data, and enabling trust. It is a global effort to raise and promote awareness around protecting one’s data and privacy. With this thought in mind, we have put together these 10 security tips on Data Privacy Day.

10 Security Tips on Data Privacy Day

1. Change the passwords of your online accounts. Here are some tips to build strong and unique ones:

  • Use a mix of uppercase and lower letters
  • Use special characters
  • Use numbers
  • Use at least 8 characters

Also, here’s a fun way to create a password that is strong and can be easily remembered. First, think of a phrase or the title of your favorite book or movie; say, “The Girl With The Dragon Tatoo”. Now, take the first letter of every word in the title – this will give you tgwtdt. Capitalize a letter, add some numbers, and special characters – and you will have the ultimate password Tgwtdt#$8945B. We tested the strength of this password, and it seems that a hacker will take about 273 years to crack it. Find it out yourself – https://www-ssl.intel.com/content/www/us/en/forms/passwordwin.html

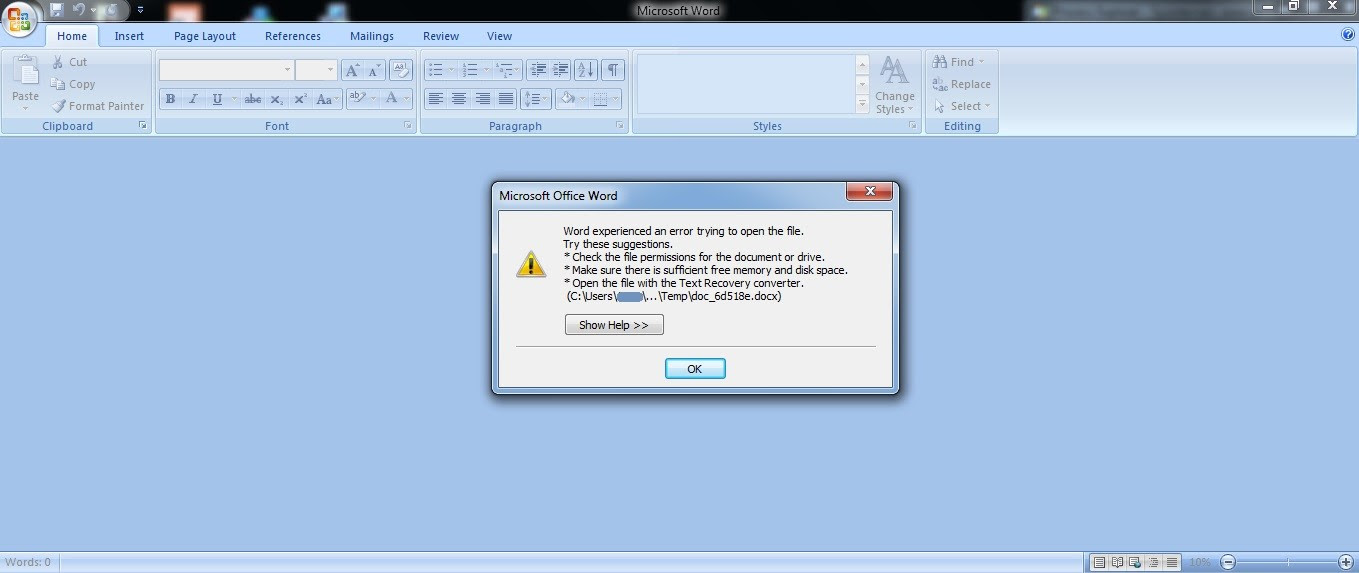
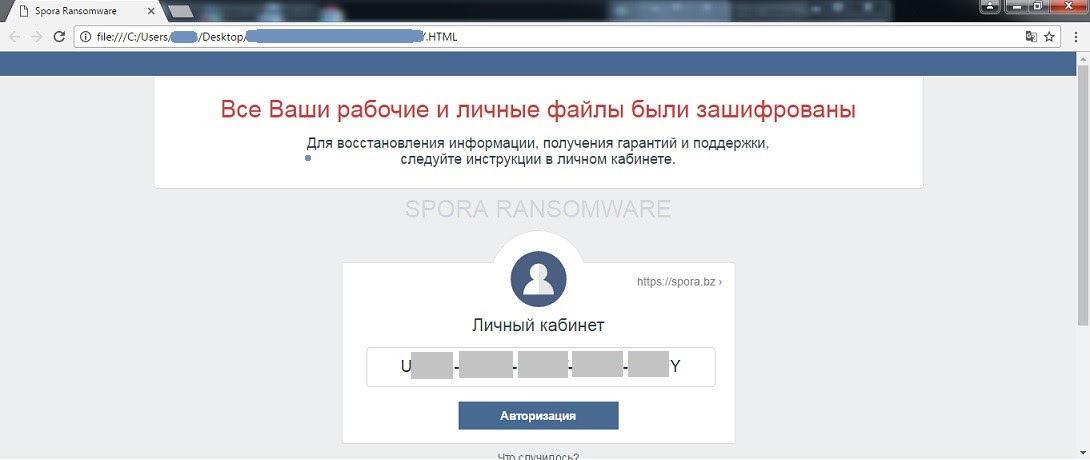
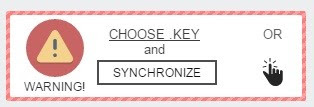
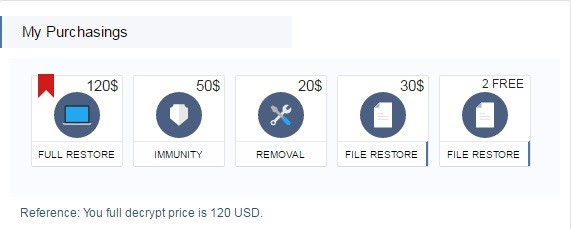
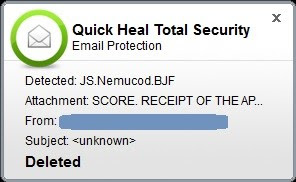
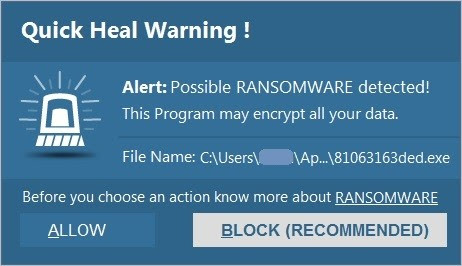
2. Take a back up of all your important data stored on your computer and mobile device. You can either take the backup over Cloud or an external hard drive. Taking regular data backups can save you from the aftermath of a virus attack or system crash – especially a ransomware infection. Ransomware is a malware that hijacks your data and demands money (ransom) to release it.

3. Data Privacy Day is not only about storing or saving data. It also advocates the importance of disposing of your information securely. Data that you delete from your computer or mobile device does not really get deleted permanently. It can still be recovered with advanced data recovery tools. So, while removing sensitive information, ensure it is gone forever. Know how to delete your data securely.

4. It is unsafe to store login ID and passwords, banking details, social security number, and other such sensitive information on your mobile device or computer. But, if you can’t help it, ensure that the data is encrypted. When you encrypt an information, it gets converted into an unreadable form, and can only be read by you. So, even if a situation arises wherein your data falls into the wrong hands, you can rest assured that it won’t get misused.

5. Just like you won’t hand over your wallet, ID card, or house key to a stranger, avoid sharing your personal information on the Internet; these could be unfamiliar websites, survey forms, online friends, unsolicited emails, and anything/anybody that asks for your information. When it comes to Data Privacy, it’s wise to be a miser in sharing your data.

6. Banking or shopping online using unsecured Wi-Fi networks can let attackers steal your personal and financial information. While using any such network, ensure it is accessible only with a login ID and password.

7. Before installing any mobile app, review its permissions carefully. Many a time, you may come across an app that asks for permissions that are not actually required for it to function on your device. For instance, if a simple Flash Light app is asking your permission to access your device’s Internet, contact details, photos, etc., then chances are it is a malicious or a potentially dangerous app. So, stay cautious against such threats.

8. One of the greatest threats to your data and privacy is phishing. Phishing is defined as an attempt to trick you into providing your personal or financial details so that the attacker can commit illegal acts using your name. Any unknown or unexpected communication (email, call, SMS, etc.) that carries a sense of urgency and requires you to provide your personal information should be treated as a phishing attack. Always ignore such communications and report them to the right authority.

9. With mobile devices becoming an integral part of our everyday lives, they store massive amounts of data about us, our friends and family members. More importantly, being smaller and compact, they are more vulnerable to theft. So, it is only logical to protect these devices with a PIN, fingerprint or a password. We do not recommend the Pattern Lock because they are easily noticeable and less secure. Also, it is wise to keep the Automatic Lock feature ON at all times.

10. While you follow all the steps mentioned above, also consider getting a trusted antivirus solution. The software that you choose must offer multiple layers of security that can block ransomware, fake, infected and phishing websites, emails designed for phishing attacks, malicious downloads, and unauthorized data storage devices.


Reference by Quick Heal

Gmail will block .js file attachments starting February 13, 2017

Gmail currently restricts certain file attachments (e.g. .exe, .msc, and .bat) for security reasons, and starting on February 13, 2017, we will not allow .js file attachments as well. Similar to other restricted file attachments, you will not be able to attach a .js file and an in-product warning will appear, explaining the reason why.

If you still need to send .js files for legitimate reasons, you can use Google Drive, Google Cloud Storage, or other storage solutions to share or send your files.Gmail will restrict js file attachments

Launch Details
Release track:
Launching to Rapid release on February 13, 2017, with Scheduled release coming 2 weeks afterward

Editions:
Available to all G Suite editions

Rollout pace:
Full rollout (1-3 days for feature visibility)

Reference by Google.com

Creating files from templates now easier in Google Drive

Since 2015, we’ve been making it easier to focus on your content—not your formatting—with templates in Google Docs, Sheets, Slides, and Forms. We’ve introduced templates for invoices, pitch decks, and cases studies, as well as templates designed by experts and developed specifically for your organization.
Today, we’re making it easier for users to create files from templates by granting access to templates directly from Google Drive. Instead of navigating to the Docs, Sheets, Slides, or Forms home pages, you can simply go to Drive > New > Google Docs/Sheets/Slides/Forms > From a template. From there, you’ll be directed to the applicable template gallery, where you can select the template of your choice.

Google Drive Templates Submenu

For more details on templates, visit the Help Center.
Launch Details
Release track:
Launching to Rapid release, with Scheduled release coming in three weeks
Editions:
Available to all G Suite editions
Rollout pace:
Gradual rollout (potentially longer than 3 days for feature visibility)
Impact:
All end users
Action:
Change management suggested/FYI

Reference by Google.com