Terminal Server Installation

Terminal Server Installation

The Terminal Server role service, known as the Terminal Server component in Windows Server® 2003, enables a Windows Server® 2008-based server to host Windows®-based programs or the full Windows desktop. From their own computing devices, users can connect to a terminal server to run programs and to use network resources on that server.
In Windows Server 2008, you must do the following to install the Terminal Server role service, and to configure the terminal server to host programs:

  1. Use Server Manager to install the Terminal Server role service.
  2. Install programs on the server.
  3. Configure remote connection settings. This includes adding users and groups that need to connect to the terminal server.

Installing the Terminal Server role service

 You can use the following procedure to use Server Manager to install the Terminal Server role service on the computer if Terminal Services is not already installed on the server. If Terminal Services is already installed on the server, see Install the Terminal Server role service (when Terminal Services is already installed). Membership in the local Administrators group, or equivalent, on the terminal server that you plan to configure, is the minimum required to complete this procedure.

To install the Terminal Server role service

Open Server Manager. To open Server Manager, click Start, point to Administrative Tools, and then click Server Manager.

  1. In the left pane, right-click Roles, and then click Add Roles.
  2. In the Add Roles Wizard, on the Before You Begin page, click Next.
  3. On the Select Server Roles page, under Roles, select the Terminal Services check box.
  4. Click Next.
  5. On the Terminal Services page, click Next.
  6. On the Select Role Services page, select the Terminal Server check box, and then click Next.
  1. On the Uninstall and Reinstall Applications for Compatibility page, click Next.
  2. On the Specify Authentication Method for Terminal Server page, select the appropriate authentication method for the terminal server, and then click Next. For more information about authentication methods, see “Configure the Network Level Authentication Setting for a Terminal Server” in the Terminal Server Help in the Windows Server 2008 Technical Library (http://go.microsoft.com/fwlink/?linkid=109280).
  3. On the Specify Licensing Mode page, select the appropriate licensing mode for the terminal server, and then click Next. For more information about licensing modes, see “Specify the Terminal Services Licensing Mode” in the Terminal Services Configuration Help in the Windows Server 2008 Technical Library (http://go.microsoft.com/fwlink/?linkid=101638).
  4. On the Select User Groups Allowed Access To This Terminal Server page, add the users or user groups that you want to be able to remotely connect to this terminal server, and then click Next. For more information, see “Configure the Remote Desktop User Group” in the Terminal Server Help in the Windows Server 2008 Technical Library (http://go.microsoft.com/fwlink/?linkid=109278).
  5. On the Confirm Installation Selections page, verify that the Terminal Server role service will be installed, and then click Install.
  6. On the Installation Progress page, installation progress will be noted.
  7. On the Installation Results page, you are prompted to restart the server to finish the installation process. Click Close, and then click Yes to restart the server.
  8. If you are prompted that other programs are still running, do either of the following:
    1. To close the programs manually and restart the server later, click Cancel.
    2. To automatically close the programs and restart the server, click Restart now.
  9. After the server restarts and you log on to the computer, the remaining steps of the installation will finish. When the Installation Results page appears, confirm that the installation of Terminal Server succeeded.

You can also confirm that Terminal Server is installed by following these steps:

  1. Start Server Manager.
  2. Under Roles Summary, click Terminal Services.
  3. Under System Services, confirm that Terminal Services has a status of Running.
  4. Under Role Services, confirm that Terminal Server has a status of Installed.

Install the Terminal Server role service (when Terminal Services is already installed)

You can use the following procedure to install the Terminal Server role service when Terminal Services is already installed on the computer. Membership in the local Administrators group, or equivalent, on the terminal server that you plan to configure, is the minimum required to complete this procedure.

To install the Terminal Server role service when Terminal Services is already installed

  1. Open Server Manager. To open Server Manager, click Start, point to Administrative Tools, and then click Server Manager.
  2. In the left pane, expand Roles.
  3. Right-click Terminal Services, and then click Add Role Services.
  4. On the Select Role Services page, select the Terminal Server check box, and then click Next.
  1. On the Uninstall and Reinstall Applications for Compatibility page, click Next.
  2. On the Specify Authentication Method for Terminal Server page, select the appropriate authentication method for the terminal server, and then click Next. For more information about authentication methods, see “Configure the Network Level Authentication Setting for a Terminal Server” in the Terminal Server Help in the Windows Server 2008 Technical Library (http://go.microsoft.com/fwlink/?linkid=109280).
  3. On the Specify Licensing Mode page, select the appropriate licensing mode for the terminal server, and then click Next. For more information about licensing modes, see “Specify the Terminal Services Licensing Mode” in the Terminal Services Configuration Help in the Windows Server 2008 Technical Library .
  4. On the Select User Groups Allowed Access To This Terminal Server page, add the users or user groups that you want to be able to remotely connect to this terminal server, and then click Next. For more information, see “Configure the Remote Desktop User Group” in the Terminal Server Help in the Windows Server 2008 Technical Library .
  5. On the Confirm Installation Selections page, verify that the Terminal Server role service will be installed, and then click Install.
  6. On the Installation Progress page, installation progress will be noted.
  7. On the Installation Results page, you are prompted to restart the server to finish the installation process. Click Close, and then click Yes to restart the server.
  8. If you are prompted that other programs are still running, do either of the following:
    1. To close the programs manually and restart the server later, click Cancel.
    2. To automatically close the programs and restart the server, click Restart now.
  9. After the server restarts and you log on to the computer, the remaining steps of the installation will finish. When the Installation Results page appears, confirm that the installation of Terminal Server succeeded.

You can also confirm that Terminal Server is installed by following these steps:

  1. Start Server Manager.
  2. Under Roles Summary, click Terminal Services.
  3. Under SystemServices, confirm that Terminal Services has a status of Running.
  4. Under Role Services, confirm that Terminal Server has a status of Installed.

SQL SERVER 2012 CAPABILITIES


SQL SERVER 2012 CAPABILITIES

The table below shows a feature comparison among the three main editions.

Features

Enterprise

Business

Intelligence

Standard

Maximum Number of Cores

OS Max¹

16 Cores-DB

OS Max-AS&RS²

16 Cores

Basic OLTP

checked

checked

checked

Programmability (T-SQL, Data Types, FileTable)

checked

checked

checked

Manageability (SQL Server Management Studio, Policy-based Management)

checked

checked

checked

Basic High Availability³

checked

checked

checked

Basic Corporate BI (Reporting, Analytics, Multidimensional Semantic Model, Data Mining)

checked

checked

checked

Basic Data Integration (Built-in Data Connectors, Designer Transforms)

checked

checked

checked

Self-Service Business Intelligence (Alerting, Power View, PowerPivot for SharePoint Server)?

checked

checked

Advanced Corporate BI (Tabular BI Semantic Model, Advanced Analytics and Reporting, VertiPaq™ In-Memory Engine, Advanced Data Mining)

checked

checked

Enterprise Data Management (Data Quality Services, Master Data Services)

checked

checked

Advanced Data Integration (Fuzzy Grouping and Lookup, Change Data Capture)

checked

Advanced Security (SQL Server Audit, Transparent Data Encryption)

checked

Data Warehousing (ColumnStore Index, Compression, Partitioning)

checked

Advanced High Availability (Multiple, Active Secondaries; Multi-site, Geo-Clustering)³

checked

¹Existing SQL Server Enterprise edition licenses in the Server + CAL licensing model upgraded to SQL Server 2012 will be limited to server deployments with 20 cores or less. Refer to Datasheet and FAQ for more details.
²Analysis Services & Reporting Services.
³Basic includes log shipping, database mirroring, server core support and two-node Failover Clustering. Windows Server Enterprise edition or above is a system requirement for AlwaysOn / Failover Clustering.
SharePoint Server with Enterprise CAL is a system requirement for Power View and PowerPivot for SharePoint. Alerting is accessible through SharePoint Foundation or above.

Use one click to shutdown and restart Windows 8

How you can create your own one-click shutdown button for the Windows 8 Start screen.

1. Go to your desktop.

2. Right click and create a new shortcut.

3. Type in the following for a shutdown button:

shutdown /s /t 0

4. If you prefer to use a restart button instead of shutdown, type in this (t instead of r):

shutdown /s /r 0

5. Name your new shortcut, choose an icon for it, then pin it to the Task bar screen.

Exchange 2013: What’s New for Transport Rules.


In Microsoft Exchange Server 2013, several improvements have been made to transport rules. This topic provides a brief overview of some of the key changes and enhancements.

Support for data loss prevention policies

Data loss prevention (DLP) features in Exchange 2013 can help organizations reduce unintentional disclosure of sensitive data. Transport rules have been updated to support creating rules that accompany and enforce DLP policies.

To learn more about DLP support in transport rules, see the following topics:
Integrating Sensitive Information Rules with Transport Rules
Data Loss Prevention

New predicates and actions

The functionality of transport rules has been extended via the addition of new predicates and actions. Each predicate listed below can be used as a condition or an exception when you’re creating transport rules.
For detailed information about using these new predicates and actions, see Transport Rule Predicates and Transport Rule Actions.

New predicates

  • AttachmentExtensionMatchesWords Used to detect messages that contain attachments with specific extensions.
  • AttachmentHasExecutableContent Used to detect messages that contain attachments with executable content.
  • HasSenderOverride Used to detect messages where the sender has chosen to override a DLP policy restriction.
  • MessageContainsDataClassifications Used to detect sensitive information in the message body and any of the attachments. For a list of data classifications available, see Sensitive

Information Types Inventory.

  • MessageSizeOver Used to detect messages whose overall size is greater than or equal to the specified limit.
  • SenderIPRanges Used to detect messages sent from a specific set of IP address ranges.

New actions

  • GenerateIncidentReport Generates an incident report that is sent to a specified SMTP address. The action also has a parameter called IncidentReportOriginalMail that accepts one of two values: IncludeOriginalMail or DoNotIncludeOriginalMail.
  • NotifySender Controls how the sender of a message that goes against a DLP policy is notified. You can choose to simply inform the sender and route the message normally, or you can
    choose to reject the message and notify the sender.
  • StopRuleProcessing Stops the processing of all subsequent rules on the message.
  • ReportSeverityLevel Sets the specified severity level in the incident report. Values for the action are: Informational, Low, Medium, High, and Off.
  • RouteMessageOutboundRequireTLS Requires Transport Layer Security (TLS) encryption when routing this message outside your organization. If TLS encryption isn’t supported, the message is rejected and not delivered.

Other changes in Transport rules

  • Support for extended regular expression syntax Transport rules in Exchange 2013 are based on the Microsoft.NET Framework regular expression (regex) functionality and now support extended regular expression syntax.
  • Transport rules agent invocation The key architectural change in Exchange 2013 for Transport rules is the Transport Rules Agent is invoked on onResolvedMessage. In previous versions of Exchange, the Rules Agent was invoked on onRoutedMessage. This change allowed us to add new actions, such as requiring TLS, which can change how a message is routed. To learn more about the transport rules architecture in Exchange 2013, see Transport Rules.
  • Exchange 2013: What’s New for Transport Rules. Detailed information about Transport rules is now included in message tracking logs. The information includes which rules were triggered for a specific message and the actions taken as a result of processing those rules.
  • New rule monitoring functionality Exchange 2013 monitors Transport rules that are configured and measures the cost of running these rules both when you’re creating the rule and also during regular operation. Exchange can detect and generate alerts for rules that are causing delays in mail delivery.

Features Of Project Editions with Differing Functionality


Features Of Project Editions with Differing Functionality

The following table displays features available in Microsoft Project Standard and Microsoft Project Professional, and describes their differences in functionality:

Feature Microsoft Project Standard Microsoft Project Professional
Consolidated projects Supports publishing of master projects and inserted projects to Microsoft Project Server.Users can be restricted from publishing master projects to Microsoft Project Server to avoid double counting of resources and inconsistent coding. Supports publishing of master projects and inserted projects to Microsoft Project Server.Users can be restricted from publishing master projects to Microsoft Project Server to avoid double counting of resources and inconsistent coding.Inserted projects of a master project must be of the same version.
Microsoft Project base calendars Users are responsible for creating base calendars for the project. Users can be restricted from creating base calendars, because enterprise calendars may be used across projects on Microsoft Project Server.
Currency settings A message notifies users about currency issues when projects with different currencies are consolidated. A specific currency setting may automatically be decided on for projects and resources on Microsoft Project Server.
Mixed mode All workgroup mode. Can be restricted to only enterprise mode or allow mixed mode.Note For consistent enterprise functionality, mixed mode should be avoided.
Global files Uses a policy or user-specific global file (Global.mpt). Uses the enterprise global template in the Microsoft Project Server database, in addition to a policy or user-specific global file (Global.mpt).
Data storage Supports mixed file and database formats. Stores all data in a Microsoft SQL Server 2000 (or later) database that can be managed by your IS operations group.
Multi-user access Users can open an already opened project as read-only. Users can use the Open dialog box to verify which projects and resources are already checked out.
Resource sharing Uses a shared resource pool. A shared resource pool is not scalable, because all resources are displayed when a sharer project opens. Uses an enterprise resource pool and displays only resources of an opened project team. An enterprise resource pool can contain a large amount of resources.
Offline file access There are no special provisions for working offline. To work offline, a project can be saved as a file on a user’s computer. Uses a cached enterprise global template that allows you to work with projects that are saved offline. Changes to an offline project can be saved online when you reconnect to Microsoft Project Server.
External dependencies Can link to multiple copies of same project. Maintains links within a version.Saving a project to another version redirects external dependencies to that version.
Inactive resources If Microsoft Project Server is used, inactive resources cannot be viewed in Microsoft Project Standard. Marked with an indicator, inactive resources are clearly displayed in resource views, and you are prompted to replace them on remaining work.

Features Only in Microsoft Project Professional

The following table displays features that are only available in Microsoft Project Professional:

Feature Microsoft Project Standard Microsoft Project Professional
Admin check-in commands Not available Used to automatically check projects, resources, and the enterprise global template back into Microsoft Project Server if they were left checked out when Microsoft Project was closed.
Enterprise global template Not available Used to standardize settings across an organization, the enterprise global template is stored in a special project on Microsoft Project Server. It can only be edited by someone with administrative privileges on the server.
Enterprise custom fields Not available Used to maintain consistency across the organization, enterprise custom fields are set up in Microsoft Project Server so that the fields and their lookup tables are the same for all projects and resources. Enterprise custom fields have specific attributes. For example, they can be required fields, so that users are prompted to enter information in that field.
Enterprise resources Not available Used to share resources across projects in the enterprise, enterprise resources are part of the organization’s pool of resources. Access to resources can be limited by permissions. Enterprise resources have a unique resource name and ID across all projects in Microsoft Project Server. Indicators differentiate local, generic, and inactive resources from enterprise resources in resource views and in the Build Team from Enterprise feature.
Build team from Enterprise Not available Used to build your team, the Build Team from Enterprise feature allows you to search for enterprise resources by any resource attribute, including availability in a specific timeframe.
Generic resources Not available Used primarily for resource substitution to replace them with specific resources who possess the same skills, generic resources are placeholder resources, not specific individuals.
Summary resource assignments Not available Summarizes the work of team members in other unopened projects in a single assignment for each project. When leveling resources in a project, summary resource assignment demands are accounted for first.
Project versions Not available. In Microsoft Project Standard, however, users can simulate project versions by saving copies of a project in different databases or folders. Supports archived and published versions of a project for “what-if” analysis and backup purposes. The published version is updated when it is opened in Microsoft Project with the latest enterprise global template and resource data. Unlike project baselines, versions represent a full copy of a project.
Project Data Services Not available Provides an extensible, secure API for solution builder access to Microsoft Project Server.
Portfolio Analyzer Not available Uses enterprise outline codes to analyze time-phased assignment data within a project or across projects in a PivotTable or PivotChart.
Resource Substitution Wizard Not available Allows you analyze the resources in the organization or within a specific department, and to make assignments based on resources’ skills and availability.
Portfolio Modeler Not available Models different project staffing scenarios to determine the feasibility of a new project, prioritize projects and resources, or find potential problems.
Resource Center Not available Displays work and availability of resources across an enterprise organization.


Office Compare suites available through volume licensing

Office Compare suites available through volume licensing

If you need to purchase five or more licenses, Microsoft Office offers two suites that are available through volume licensing—Office Professional Plus 2013 and Office Standard 2013. If you need fewer than five licenses, see the comparison for other Office suites.

The following table illustrates the different applications in the two suites and their enterprise value. The suites also differ in the level of integration with related business productivity servers.


Office Standard
2013
Office Professional Plus 2013
Applications
word_2013 Word 2013
Transform your ideas into professional-looking documents.
right_logo right_logo
excel_2013 Excel 2013
Achieve valuable insights with powerful analysis tools.
right_logo right_logo
powerpoint_2013 PowerPoint 2013
Turn your ideas into impactful presentations.
right_logo right_logo
onenote_2013 OneNote 2013
Collect your information in one easy-to-find place.
right_logo right_logo
outlook_2013 Outlook 2013 with Business Contact Manager
All of the benefits of Outlook 2013, plus powerful customer and contact management.
right_logo right_logo
publisher_2013 Publisher 2013Create professional-quality publications and marketing materials. right_logo right_logo
Office Web Apps (Word, Excel, PowerPoint, OneNote) right_logo right_logo
access_2013 Access 2013
Track and report important information with easy-to-use database tools.
right_logo
infopath_2013 InfoPath 2013Quickly collect the information your business needs with easy-to-create forms. right_logo

lync_2013 Lync 20131

Be more productive by communicating and collaborating easily with others in different locations.

right_logo
Enterprise value right_logo
Group policy
Volume activation right_logo right_logo
Terminal service right_logo right_logo
App telemetry right_logo right_logo
Compliance and archiving1

With Team Mailbox, users can: share mail and docs directly to a folder; inform or block email with sensitive information; encrypt email inside and outside of your organization. Archive recorded meetings, including IM conversations.

right_logo
Business intelligence

Explore different views of data with a click. Conduct a cross-tab analysis of large datasets for a 360° view. Predict trends by quickly charting historical trends. Scan spreadsheets for errors, hidden info, broken links, and inconsistencies. View audit trail of changes in spreadsheet.

right_logo
Enterprise voice1

Put a Lync call on hold and continue another conversation. Support for call center type of usage (group of phones rings when a single number is dialed); ability to trace malicious calls. Enable/disable ability to record Lync meetings.

Limited right_logo

Information rights management and policy capabilities1

Safeguard digital information from unauthorized use through integration with Windows Rights Management Services (RMS) for Windows Server.

Limited right_logo
Contextual access to business and social networking1

Get a people-centric view of your company and connect to popular social networking sites to get news from customers, prospects, and partners.

Limited right_logo
Integrated enterprise content management1

Provide secure access to business information through operability with SharePoint.

Limited right_logo
Publish data insights1

Publish worksheets with strong fidelity to the web, and create web databases.

Limited right_logo

Unified instant messaging, presence, and voice1

Easily communicate with others in different locations or time zones using familiar Office tools and Lync.

Limited right_logo
Managed email folders and retention policy1

Use a variety of tools and features that improve your organization’s ability to maintain compliance with document retention policies—from accessible document creation to email retention.

right_logo
Integrated electronic forms1

Extend InfoPath forms to Internet browsers and mobile devices for use in SharePoint-enabled business workflows and other areas.

right_logo

The suites provide different levels of integration with business productivity servers. Contact a Microsoft Certified Partner to find the best solution for your needs.

Physical Memory Limits for Different OS


Physical Memory Limits for Different OS

Physical Memory Limits: Windows 8

The following table specifies the limits on physical memory for Windows 8.

Version Limit on X86 Limit on X64
Windows 8 Enterprise 4 GB 512 GB
Windows 8 Professional 4 GB 512 GB
Windows 8 4 GB 128 GB

Physical Memory Limits: Windows Server 2012

The following table specifies the limits on physical memory for Windows Server 2012. Windows Server 2012 is available only in X64 editions.

Version Limit on X64
Windows Server 2012 Datacenter 4 TB
Windows Server 2012 Standard 4 TB
Windows Server 2012 Essentials 64 GB
Windows Server 2012 Foundation 32 GB
Windows Storage Server 2012 Workgroup 32 GB
Windows Storage Server 2012 Standard 4 TB
Hyper-V Server 2012 4 TB


Physical Memory Limits: Windows 7

The following table specifies the limits on physical memory for Windows 7.

Version Limit on X86 Limit on X64
Windows 7 Ultimate 4 GB 192 GB
Windows 7 Enterprise 4 GB 192 GB
Windows 7 Professional 4 GB 192 GB
Windows 7 Home Premium 4 GB 16 GB
Windows 7 Home Basic 4 GB 8 GB
Windows 7 Starter 2 GB N/A


Physical Memory Limits: Windows Server 2008 R2

The following table specifies the limits on physical memory for Windows Server 2008 R2. Windows Server 2008 R2 is available only in 64-bit editions.

Version Limit on X64 Limit on IA64
Windows Server 2008 R2 Datacenter 2 TB
Windows Server 2008 R2 Enterprise 2 TB
Windows Server 2008 R2 for Itanium-Based Systems 2 TB
Windows Server 2008 R2 Foundation 8 GB
Windows Server 2008 R2 Standard 32 GB
Windows HPC Server 2008 R2 128 GB
Windows Web Server 2008 R2 32 GB


Physical Memory Limits: Windows Server 2008

The following table specifies the limits on physical memory for Windows Server 2008. Limits greater than 4 GB for 32-bit Windows assume that PAE is enabled.

Version Limit on X86 Limit on X64 Limit on IA64
Windows Server 2008 Datacenter 64 GB 1 TB
Windows Server 2008 Enterprise 64 GB 1 TB
Windows Server 2008 HPC Edition 128 GB
Windows Server 2008 Standard 4 GB 32 GB
Windows Server 2008 for Itanium-Based Systems 2 TB
Windows Small Business Server 2008 4 GB 32 GB
Windows Web Server 2008 4 GB 32 GB


Physical Memory Limits: Windows Vista

The following table specifies the limits on physical memory for Windows Vista.

Version Limit on X86 Limit on X64
Windows Vista Ultimate 4 GB 128 GB
Windows Vista Enterprise 4 GB 128 GB
Windows Vista Business 4 GB 128 GB
Windows Vista Home Premium 4 GB 16 GB
Windows Vista Home Basic 4 GB 8 GB
Windows Vista Starter 1 GB


Office 365 for business FAQ


Office 365 for business FAQ

What is Office 365? How is it different from Microsoft Office?

“Office 365” refers to subscription plans that include access to Office applications plus other productivity services that are enabled over the Internet (cloud services), such as Lync web conferencing and Exchange Online hosted email for business, and additional online storage with SkyDrive and Skype world minutes for home.
Many Office 365 plans also include the desktop version of the latest Office applications, which users can install across multiple computers and devices. The Office 365 plans that are online-only are a great choice for certain business needs, and they are compatible with desktop versions of the latest version of Office, Office 2010, Office 2007 (with slightly limited functionality), Office 2011 for Mac, and Office 2008 for Mac.
All Office 365 plans are paid for on a subscription basis, monthly or annually.
“Microsoft Office” is the name we still use for our familiar productivity software. Office suites have traditionally included applications such as Word, Excel, PowerPoint, and Outlook. All the new Office suites (for example, Office Standard 2013) include the latest versions of these applications. These suites can be installed on only one PC and do not come with any cloud-based services included in Office 365.

Will Office 365 work with my copy of Office?

Office 365 works best with the latest version of Office, Office 2010, and Office 2011 for Mac. Office 365 works with slightly limited functionality with Office 2007. If you have an earlier edition of Office, you will need to update to a newer version of Office in order to use Office 365; or you can subscribe to one of the many Office 365 plans that include the latest version of Office. In addition to getting the latest version of Office as part of your subscription, you will also get automatic updates, so your Office will always be up to date. Compare plans.

Is Internet access required for Office 365?

Internet access is required to install and activate all Office 365 plans and to manage your subscription account. Internet connectivity is also required to access Office 365 cloud productivity services, including email, conferencing, IT management, and other services.
Many Office 365 plans also include the desktop version of Office, for example, Office 365 Small Business Premium and Office 365 Enterprise E3. One of the benefits of having the desktop version of Office applications is that you can work offline and have the confidence that the next time you connect to the Internet all your work will automatically sync, so you never have to worry about your documents being up to date. Your desktop version of Office is also automatically kept up to date and upgraded when you connect to the Internet, so you always have the latest tools to help you work. Compare Office 365 plans.

What is the cloud?

“The cloud” is a friendly way of describing web-based computing services that are hosted outside of your organization. When you use cloud-based services, your IT infrastructure resides off your property (off-premises), and is maintained by a third party (hosted), instead of residing on a server at your home or business (on-premises) that you maintain. With Office 365, for example, information storage, computation, and software are located and managed remotely on servers owned by Microsoft. Many services you use every day are a part of the cloud—everything from web-based email to mobile banking and online photo storage. Because this infrastructure is located online or “in the cloud,” you can access it virtually anywhere, from a PC, tablet, smartphone, or other device with an Internet connection.

How many users does Office 365 support?

Office 365 is highly scalable and can support everything from a one-person business to companies with tens of thousands of users:
Office 365 small business plans are best for companies with up to 10 employees, and can accommodate up to 25 users.
Office 365 Midsize Business is best for companies with 11 to 250 employees, and can accommodate up to 300 users.
Office 365 enterprise plans fit organizations ranging in size from a single employee to 50,000-plus users.

What do I need to install when I sign up for Office 365?

You don’t need to install anything in order to use Office 365.
To help you easily connect your desktop version of the latest version of Office, Office 2010, or Office 2007 to Office 365, Microsoft provides Office 365 customers an installable piece of software—called “Office Desktop Setup”—at no charge.
Office Desktop Setup provides many benefits, including:

  • Automatically detecting necessary updates.
  • Installing updates and components upon approval or silently from a command line.
  • Automatically configuring Outlook and Microsoft Lync for use with Microsoft Office 365.
  • Uninstalling itself from the client computer after running.

You can find and install Office Desktop Setup in your Office 365 administration center.

If your plan includes a subscription to Office, you will also be able to install that directly from the Office 365 administration center.

What if I already own a domain name?

You can add the domain name you own to Office 365 to create both domain-based email addresses and a public-facing website.

What do I need to do to add a domain name?

To add your organization’s custom domain to Office 365, you must have access to the DNS records for that domain. If you do not have access, you should contact the person at your company that manages the company domain account.

What do I need to do to add a domain name?

To add your organization’s custom domain to Office 365, you must have access to the DNS records for that domain. If you do not have access, you should contact the person at your company that manages the company domain account.

Can I switch to other Office 365 plans?

You can transition your account within plan families, for example, from Office 365 Small Business to Office 365 Small Business Premium, or from Office 365 Enterprise E1 to Office 365 Enterprise E3 or E4. You cannot transition between Office 365 plan families, that is, from an Office 365 Small Business plan to Office 365 Midsize Business or an Office 365 Enterprise plan, or vice versa. In order to change from a plan in one family to another (for example, from a Small Business plan to the Midsize Business plan, or from the Midsize Business plan to an Enterprise plan), you must first cancel your account with the plan you currently have, and then sign up for a different one.

Can I cancel my subscription at any time?

You can cancel your subscription at any time. However, depending on the product and the type of subscription you have, there may be a penalty for canceling before the end of your contract. For subscriptions with a month-to-month commitment there is no penalty for cancelling your contract at any time. Subscriptions with an annual commitment may incur some penalties if canceled early. Read the complete Microsoft Online Subscription Agreement.

What happens to my data if I cancel my subscription?

Your data is yours. If you decide to cancel your Office 365 subscription, you can download your data—for example, your email and documents on team sites—and save it to another location. You should save your data before you cancel. All the data associated with your Office 365 account is deleted 90 days after cancellation.

I will need extra help setting up Office 365. Who can help?

Microsoft experts are trained IT and development companies that can help you move to Office 365 or develop custom solutions for your business. You can find a listing of all of our Microsoft experts in Microsoft Pinpoint.

Volume License Activation


What is Volume Activation?
Volume Activation is a product activation technology that was first introduced with Windows Vista and Windows Server 2008. It is designed to allow Volume License customers to automate the activation process in a way that is transparent to end users.

Volume Activation applies only to systems that are covered under a Volume Licensing program and is used strictly as a tool for activation. It is not tied to license invoicing or billing.

Volume Activation provides two different models for completing volume activations. Either or both key types may be used by customers to activate systems in their organization:

  • Key Management Service (KMS)
    KMS allows organizations to activate systems within their own network.
  • Multiple Activation Key (MAK)
    MAK activates systems on a one-time basis, using Microsoft’s hosted activation services.

Important: As part of your installation, it is important to plan and manage deployment of any product using Volume Activation.

What is the Key Management Service (KMS)?
The Key Management Service (KMS) is an activation service that allows organizations to activate systems within their own network, eliminating the need for individual computers to connect to Microsoft for product activation. It does not require a dedicated system and can be easily co-hosted on a system that provides other services.

KMS requires a minimum number of either physical or virtual computers in a network environment. These minimums, called activation thresholds, are set so that they are easily met by Enterprise customers.

  • Activation Thresholds for Windows – Your organization must have at least five (5) computers to activate servers running Windows Server 2008 or Windows Server 2008 R2 and at least twenty-five (25) computers to activate client systems running Windows Vista or Windows 7.
  • Activation Thresholds for Office – Your organization must have at least five (5) computers running Office 2010, Project 2010, or Visio 2010 to activate installed Office products using KMS. For more information about Volume Activation of Office products (that is, Office 2010, Project 2010, and Visio 2010), see the Volume Activation Quick Start Guide for Office 2010, and Volume Activation Overview for Office 2010.

What is a Multiple Activation Key (MAK)?
A Multiple Activation Key (MAK) activates systems on a one-time basis, using Microsoft’s hosted activation services (that is, it requires connection with a Microsoft activation server). Once computers are activated, no further communication with Microsoft is required.
Important: Each MAK has a predetermined number of allowed activations, based on your Volume Licensing agreement. Contact the Microsoft Activation Center to increase your MAK activation limit.
You can activate licenses in one of two ways using MAK:

  • MAK Independent Activation – Each computer individually connects to Microsoft via the web or telephone to complete activation.
  • MAK Proxy Activation – One centralized activation request is made on behalf of multiple computers with a single connection to Microsoft online or by telephone. This method uses the Volume Activation Management Tool (VAMT), which is a part of the Windows 7 Automated Installation Kit (WAIK). VAMT enables IT Professionals to automate and centrally manage the Volume Activation process using MAK, and includes a check on the number of activations on the MAK.

Can Customer use both MAK and KMS for deployment across my organization?
Yes. Volume Licensing customers can use KMS, MAK, or a combination of each to activate systems in their organization.

Office 365 Small Business Premium Activation


Tip of day

Office 365 Small Business Premium Activation
New Product Key Subscription

These activation steps are to be completed after you have purchased the required number of Product Keys.
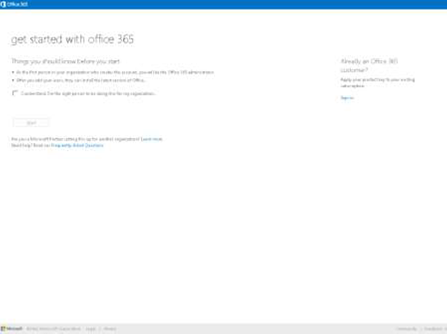
1. Go to www.office.com/setup365 and click the “I understand” checkbox and then the “Start” button to begin.
The first user account becomes the default administrator of the service. This can be changed after setup is complete.
Users added during the setup will download Office when they login to the service.

tip_of_day_1

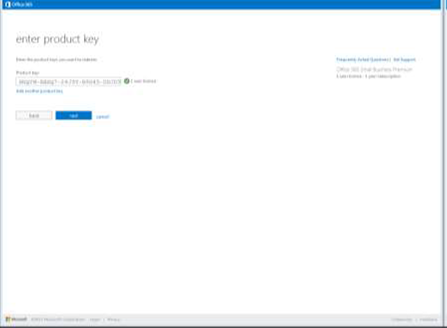
2. Enter the first 25-digit Small Business Premium Product Key. If the Product Key is valid and entered correctly,
then a green check and the number of user licenses associated with that key will appear. The total number of user
licenses to be activated shows on the far right corner of the screen.

tip_of_day_2

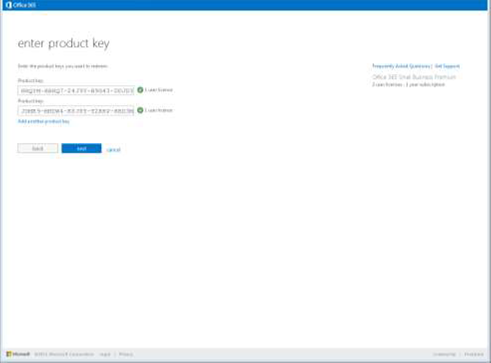
3. If there are additional Product Keys to activate, then click the “Add another Product Key” link, enter the
remaining Product Keys, and click “Next.” For the best user experience, be sure to enter all Product Keys during
the setup process. Customers can also add additional Product Keys via the “Add Seats” wizard at a later date.

tip_of_day_3

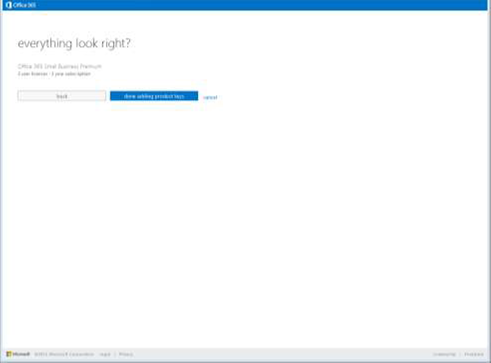
4. Verify that the information in the summary screen looks correct and click the “Done adding Product Keys”
button to continue the process. If the information does not look correct, click the “Back” button and add additional
Product Keys.

tip_of_day_4

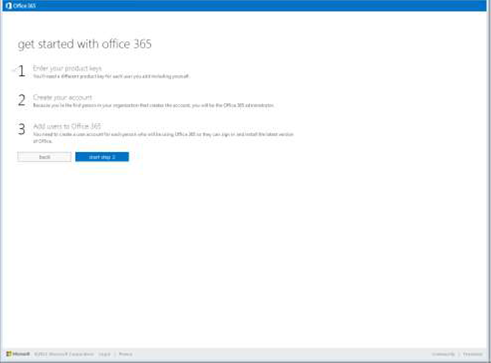
5. Click the “Start step 2” button to continue the setup process. The first step of the three-step setup process has
been completed. The remaining steps are to create an Office 365 account and assign any users if required.

tip_of_day_5

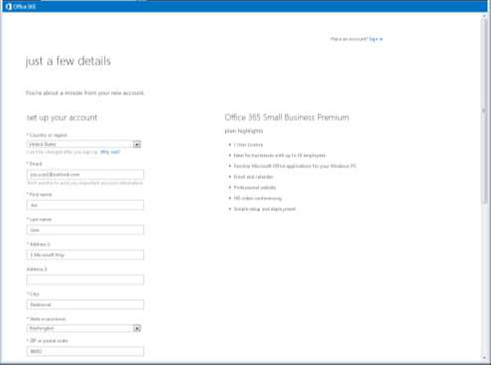
6. Create an Office 365 Account. If the customer does not have an Office 365 account already, then complete the
sign-up form. If the customer is already an existing Office 365 Plan P1 subscriber, click the Sign-in button to bypass
account setup and begin the “Add Product Key seats” wizard.

tip_of_day_6

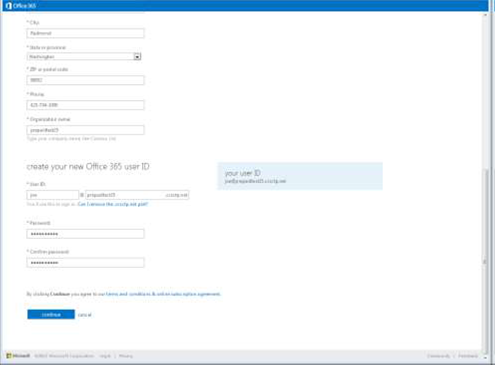
7. Click “continue” to create the Office 365 service tenant. Note that “Organization Name” is used to create an
Office 365 service tenant and needs to be unique. By clicking continue, you [the customer] accept the Microsoft
Online Subscription Agreement. At this point, the Product Keys are marked as activated and cannot be used again.
Be sure to keep the Office 365 User ID and password in a safe place so that you can login to the Office 365 service.

tip_of_day_7

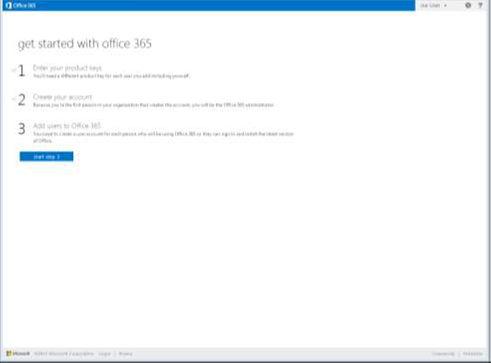
Click the “Start step 3” button to continue the setup process. The second step of the three-step setup process
has been completed. The remaining step is to assign users if multiple Product Keys were entered in Step 1.

tip_of_day_7-2

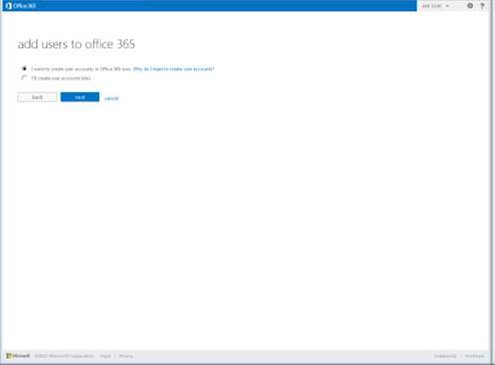
8. If you entered multiple Product Keys during step 1, then click the “I want to create user accounts in Office 365 now” radio button & click the “next” button. This wizard will guide you through creating a user and assigning a license.

tip_of_day_8

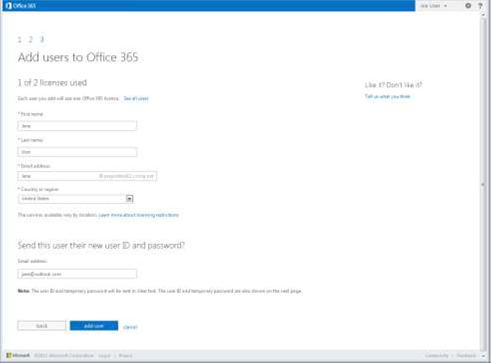
9. Complete the add user form and click the “add user” button. Enter the First and Last name and Email address. Select the country the user resides in, and enter their personal email address if you want to send their new Office 365 user account directly via email to a personal email address; otherwise leave blank.

tip_of_day_9

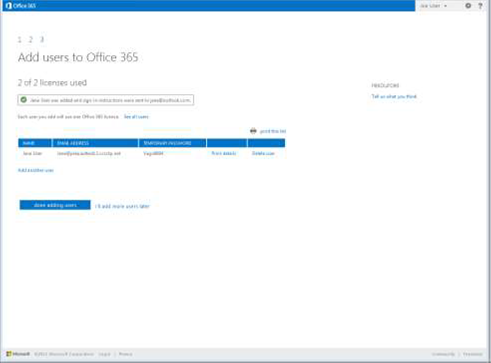
10. If you plan to distribute the Office 365 account and passwords manually, then be sure to print this screen and then the click “done adding users” button. The add user wizard is now complete.

tip_of_day_10

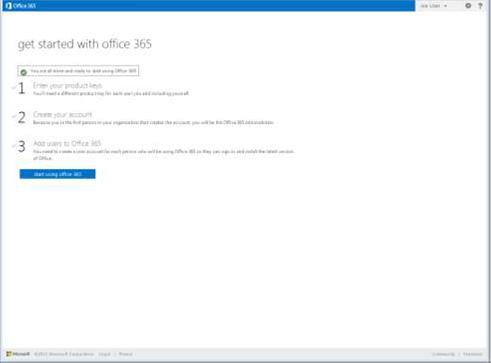
11. The Product Key activation is now complete. Click the “start using office 365” button to begin service setup.

tip_of_day_11

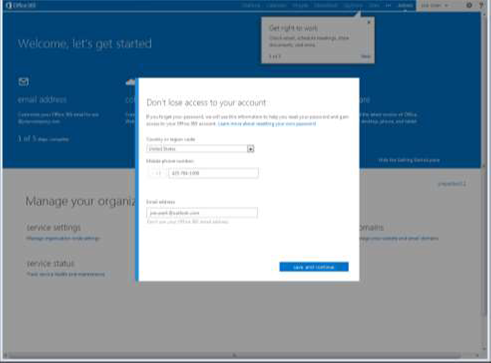
12. Enter the administrator’s mobile phone number and secondary email address, for automatic password reset access, and then click the “save and continue” button. This enables Office 365 to automatically reset your password if it is ever forgotten.

tip_of_day_12

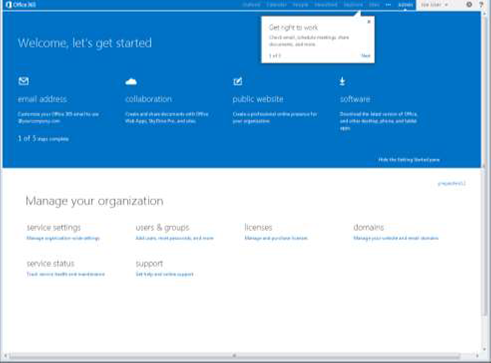
13. Begin the Office 365 Small Business Premium service setup. Follow the Office 365 startup wizard to configure your Office 365 service.

tip_of_day_13