Install Self Signed Exchange 2010 SSL certificate

For my example, my domains are…

Local domain: vcp.local
Outside domain: vcpdomain.com.au

#NETBIOS name of Client Access exchange server:        vcpsydex01
#Internal FQDN (AD name):        vcpsydex01.vcp.local
#External FQDN (Public name):        smtp.vcdomain.com.au
#Autodiscover name:            autodiscover.vcdomain.com.au
#SubjectName:                cn=smtp.vcdomain.com.au

Run the following command on the Client Access Server for generating the new Self-Signed SSL cert using the names listed above:

New-ExchangeCertificate -FriendlyName “SelfSigned Cert” -SubjectName “cn=smtp.vcdomain.com.au” -DomainName vcpsydex01,vcpsydex01.vcp.local,smtp.vcdomain.com.au, autodiscover.vcdomain.com.au -PrivateKeyExportable $True

Prior to Windows Vista SP1, the Windows RPC/HTTP client-side component required that the Subject Name (aka Common Name) on the certificate match the “Certificate Principal Name” configured for the Outlook Anywhere connection in the Outlook profile. Therefore, as a best practice, you should ensure that smtp.vcdomain.com.au is listed as the Subject Name in your certificate unless you plan on changing the configuration which can be achieved by using the Set-OutlookProvider cmdlet with the -EXPR parameter as described in http://msexchangeteam.com/archive/2008/09/29/449921.aspx.

Open IIS on the Exchange Server and tell it to use this certificate.

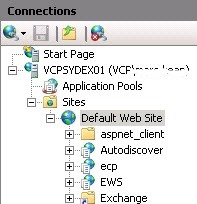
  1. Click on the Default Web Site
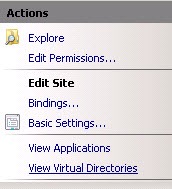
  2. Click Bindings on the right
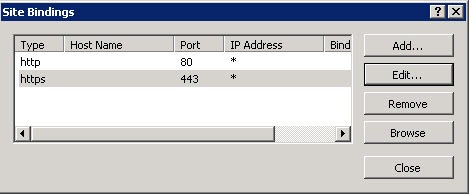
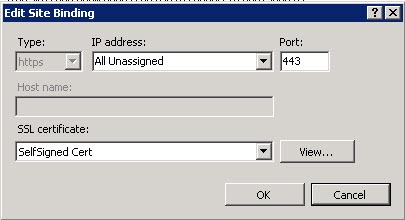
  3. Select HTTPS, and choose edit
  4. Under SSL certificate, click the drop down list and choose your certificate that you created earlier.
  5. You need to setup the following external DNS entries 1. smtp.vcdomain.com.au 2. autodiscover.vcdomain.com.au, these need to point to the external IP address of your Exchange CAS server.
    The next few steps are to install the certificate to the Clients.
  6. From Internet Explorer, navigate to the website of your OWA, https://mail.vcdomain.com/owa Click on Certificate Error, then click View certificates.
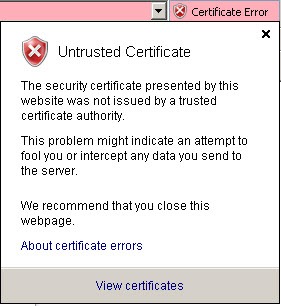
  7. Click Install Certificate
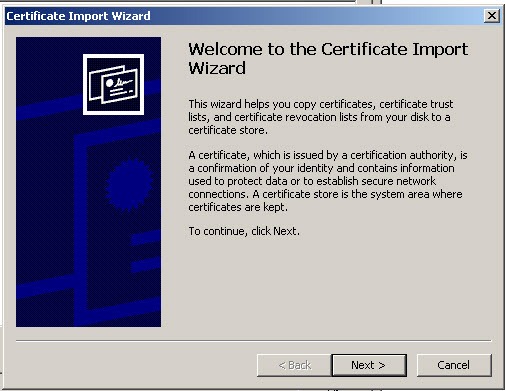
  8. Click Next
  9. Select the second option
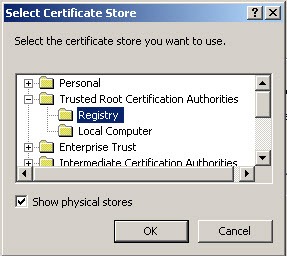
  10. Select the box Show Physical Stores, Under Trusted Root Certification Authorities, select Registry and click OK

    Please note, you will need to repeat this step again and choose Local Computer. 
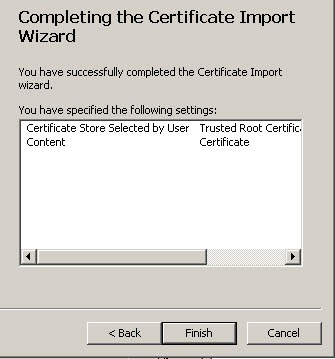
  11. Click Finish
  12. Select Yes. Close and re-open Internet Explorer.
  13. Close and restart Internet Explorer.

For more information, please refer to http://msexchangeteam.com/archive/2007/07/02/445698.aspx

Configure an SSL Certificate for Exchange Server 2010

Exchange Server 2010 like its predecessor Exchange Server 2007 makes heavy use of SSL certificates for various communications protocols. When you install a new Exchange server is comes pre-configured with a self-signed certificate. Before putting a new server into production you should create and assign a new SSL cert for the server.
In this example an SSL cert is being configured for the contoso.local organzation.

Generate a New Exchange Server 2010 Certificate

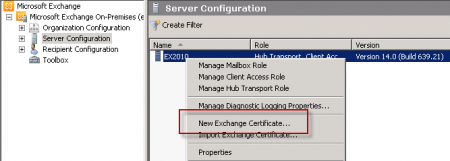
In the Exchange Management Console navigate to Server Configuration. Right-click the server and choose New Exchange Certificate.

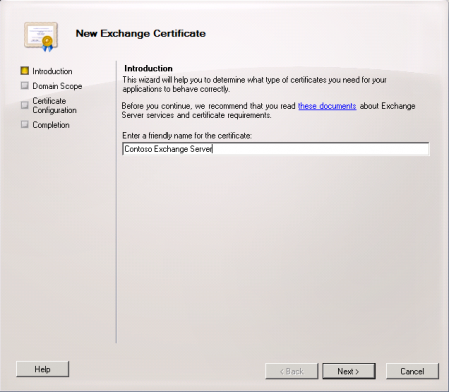
Enter a friendly name for the new cert. In this example I have named it “Contoso Exchange Server”.

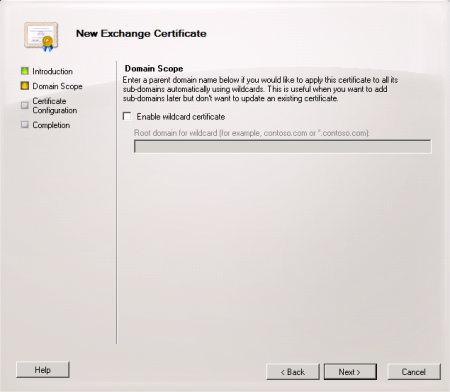
Although wildcard certificates are supported in Exchange Server 2010 it is recommended to use a SAN (Subject Alternative Name) cert instead.

Next we can configure the names for each of the Exchange 2010 services that are secured with the SSL certificate.

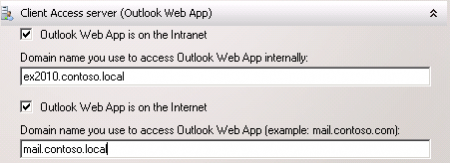
First is the Outlook Web App service. Enter the internal and external names of Outlook Web App. In this example I am using “ex2010.contoso.local” for internal, and “mail.contoso.local” for external.

Next configure the ActiveSync domain name. For ease of administration and configuration I am using the same name as for Outlook Web App.

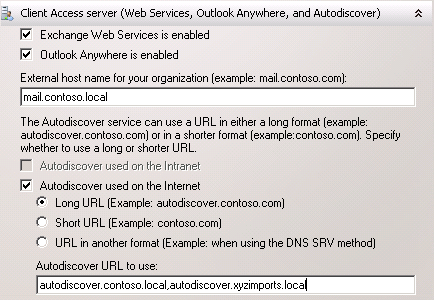
Next are the Web Services, Outlook Anywhere (http://exchangeserverpro.com/how-to-configure-exchange-server-2010-outlook-anywhere) and Autodiscover names. Once again I am using the same name of “mail.contoso.local”. For Autodiscover the additional names of “autodiscover.contoso.local” and “autodiscover.xyzimports.local” are also configured, for each of the accepted email domains in this example organization.

The Hub Transport server also requires SSL for secure SMTP communications. In this example I am using the name “mail.contoso.local”.

A legacy name for co-existence is required if you are planning to gradually transition services and data from Exchange 2003 to Exchange 2010. Configure legacy names for each of the namespaces in the organization, in this example “legacy.contoso.local” and “legacy.xyzimports.local”.

When all of the services have been configured proceed to the next step of the New Exchange Certificate wizard.

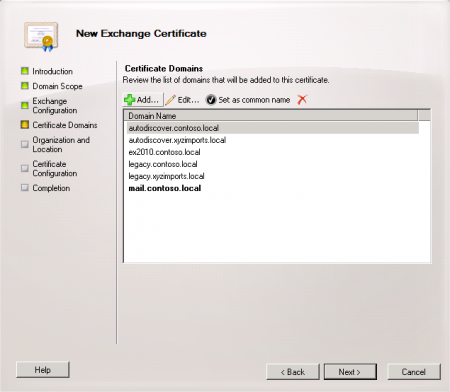
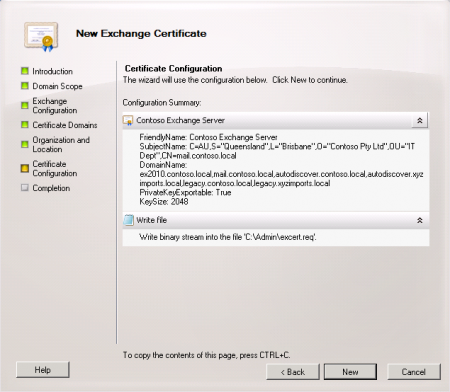
Confirm that all of the required names have been included in the cert request. You can add any additional names at this stage before proceeding.

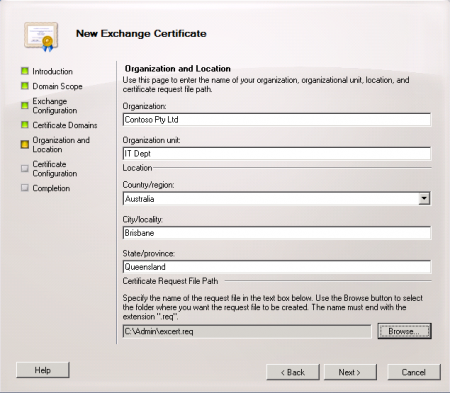
Next configure the organization and location information for the certificate, and choose a location to generate the request file.

When you have finished filling out the wizard click the New button to generate the cert request file.

Confirm that the request file was successfully generated.

You will notice that the wizard makes a recommendation as to the type of certificate that is required for your Exchange organization. In most cases a “Unified Communications certificate” will be necessary, which is basically another name for a SAN certificate.

Although you can issue the certificate from a private Certificate Authority it is recommended to use acommercial Certificate Authority such as Digicert.

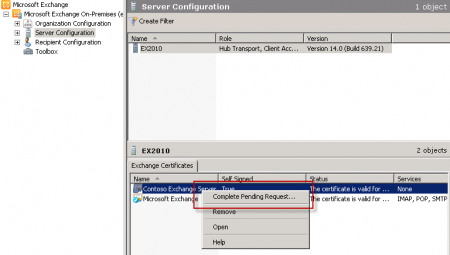
After you have acquired the new certificate return to the Exchange Management Console, navigate to Server Configuration, right-click the server and choose Complete Pending Request.

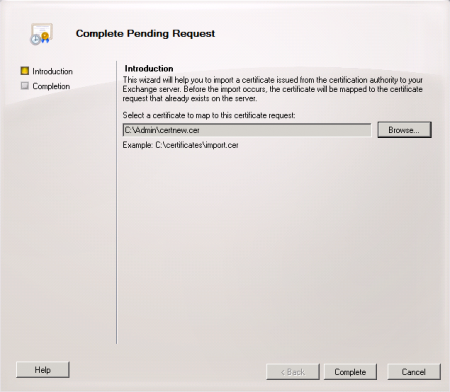
Browse to the location of the file you downloaded from the CA and complete the wizard. Confirm that the new SSL certificate was imported successfully.

The new certificate now appears in the list of valid certificates for the server.

Assign the New Certificate to Exchange Server 2010

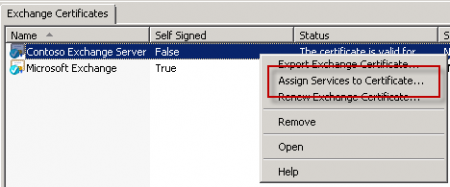
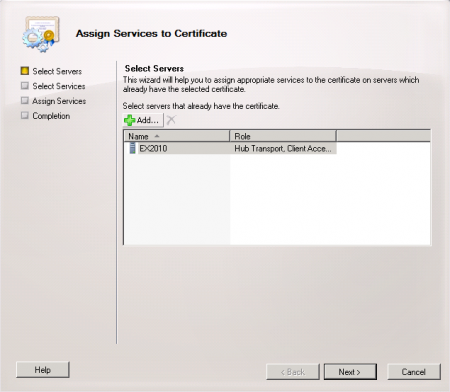
With the valid SSL certificate installed it is now time to assign it to the Exchange Server 2010 services. Right-click the new certificate and choose “Assign Services to Certificate”.

Choose the new Exchange server and click the Next button.

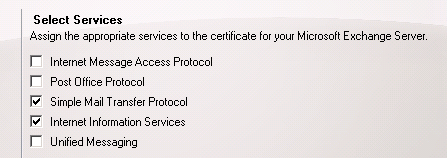
Choose the services to assign to the certificate. In this example the IIS and SMTP services are being assigned.

Complete the wizard to assign the services to the new SSL certificate. You will be prompted to overwrite the existing self-signed certificate, so choose Yes to that prompt.